Abandoned Cart Pro for WooCommerce plugin helps you recover lost sales by sending timely reminders and personalized discount offers via email, text, and messenger. When a customer abandons their cart, the plugin automatically triggers reminders to bring them back and complete the purchase. The plugin also offers pop-ups, customized email templates, and exclusive discount coupons to encourage customers to finalize their orders. Also, it has an Abandoned Orders listing tab to display all the abandoned orders that have remained in the cart for a time higher than the “Cart abandoned cut-off time” setting.
Setup and Installation
↑ Back to top- Download the .zip file from your WooCommerce account.
- Go to: WordPress Admin > Plugins > Add New and Upload Plugin with the file you downloaded with Choose File.
- Install Now and Activate the extension.
More information at Install and Activate Plugins/Extensions.
Abandoned Cart Pro Dashboard
↑ Back to topThe Dashboard is an interface that displays the Abandoned Cart Pro plugin’s key information together in a simple and readable format.
It gives the store owner an overview of the number of abandoned orders emails captured through Popups, what the Abandoned Cart and Email Stats are, or even information about the recovered revenue!
Go to WooCommerce > Abandoned Carts > Dashboard.

Here you will find:
1. RECOVERED AMOUNT
2. ABANDONED ORDERS
3. NUMBER OF EMAILS SENT
4. EMAIL CAPTURE POP DISPLAY
5. WOOCOMMERCE- ABANDON CART GRAPH – DAY WISE
6. WOOCOMMERCE- ABANDON CART GRAPH – MONTH WISE
7. PRODUCT REPORT
8. ABANDONED ORDERS
1. RECOVERED AMOUNT
↑ Back to topThis gives you the number of abandoned carts that were recovered. It means that the users clicked on the link provided in the abandoned cart emails and purchased the pending orders, thereby changing the abandoned carts to recovered carts.
For instance, here the image shows that 3 carts were recovered which means that 3 users clicked on the link to go to their abandoned cart and recovered i.e. complete their orders.

It will also some other stats such as the percentage of how many abandoned carts were recovered and the percentage of total revenue made from these recovered carts.
In this instance, since 3 orders were recovered, it made 27.27% of recovered abandoned orders thereby contributing to 43.51% of the Total Revenue.
2. ABANDONED ORDERS
↑ Back to topAbandoned Orders are those when products are added to the cart but their purchase is not completed. These orders are identified as per the time limit set for Cart abandoned cut-off time setting is reached.
The Cart abandoned cut-off time setting is located at Abandoned Carts > Settings > General tab. The below image shows that 11 orders were abandoned.

Along with this, you will see the total amount of these abandoned orders. In this case, it is $4545.
3. NUMBER OF EMAILS SENT
↑ Back to topOnce the cart is abandoned, a reminder email is sent to the registered Email address as per the email template selected under the Templates tab. Email is sent with a link that will redirect you to the cart/checkout page with the item which was abandoned.
When the cart is abandoned, the email is sent automatically only if the Enable abandoned cart emails setting under the Settings tab is enabled & the email template is Active.
When the reminder emails are sent to the customer, the dashboard shows the total number of abandoned cart reminder emails that were sent to the customers for their abandoned orders.

3. a) Open Rate
Open Rate means the total number of abandoned cart reminder emails sent versus the total number of abandoned cart reminder emails opened.
An abandoned cart reminder email will provide the details of the items in your cart like item name, price, quantity, and the link to go to the cart again to place the pending order. Reminder emails also show the coupon code if applicable to avail of a discount, etc.
Therefore, an Open Rate for the above example shows that out of the total reminder emails, 34 emails are sent and only 6 emails were opened by the users.
3. b) Click Rate
Similarly, Click Rate gives you the total number of abandoned cart reminder emails opened versus the total number of links clicked from the reminder emails. This link will redirect you to the cart/checkout page with the items you have abandoned.
The above example shows that out of the 34 emails sent, only 3 of them clicked on the link to place their order.
4. EMAIL CAPTURE POP DISPLAY
↑ Back to topThis section shows the number of popups that were displayed to the customers in order to capture their email addresses. The Abandoned Cart captures emails in two ways: through Add to Cart Popups and Exit Intent Popups.

In the above image, the total number of Email capture Popups (including Add to Cart and Exit Intent) is 23.
Out of these, 11 email addresses were captured using the Add to Cart Popups.
Similarly, 6 email addresses were captured through Exit Intent Popups.
Now, in order to understand the abandoned cart stats holistically, you can view the graphs based on different time periods. Here, you can see the abandoned and recovered revenue at a glance for which dates the said revenue was high/low.
For this, use the search criteria to filter the orders and revenue datewise. You can either select the range from the dropdown list or select Custom from the dropdown to customize your search. The dropdown list will have the following options to select from This Month, Last Month, This Quater, Last Quater, This Year, Last Year, and Custom.

When you select any of the above options except Custom, all the respective data will be displayed. When you select Custom, you will be asked to enter the To and From date and click on Apply filters, all the details between that date range will be displayed.

For instance, you have chosen to go with This month:

You will be displayed the following two graphs:
5. WOOCOMMERCE- ABANDON CART GRAPH – DAY WISE
↑ Back to topThis graph will show the Abandoned Revenue and Recovered Revenue in the current month.
Abandoned Revenue refers to the amount from the abandoned carts.
Recovered Revenue refers to the amount recovered from the recovered orders.
Since it is the month of May, the graph depicts that on 1st May 2023, a total of $2305 amount was abandoned while $1120 of it was recovered.
In the days following this, there was no activity while on 22nd May 2023 you see that some amount was abandoned:

6. WOOCOMMERCE- ABANDON CART GRAPH – MONTH WISE
↑ Back to topSimilarly, in this graph, you will see month-wise growth or a decline in your sales as a result of abandoned orders.
In this below case, growth could be seen in the Abandoned Revenue as well as Recovered Revenue from March to April, where it peaked in April. Following this, there was a decline from April to May.
If Abandoned Revenue and Recovered Revenues are compared then the Abandoned Revenue has been more:

7. PRODUCT REPORT
↑ Back to topIn this section, you’ll get stats about the number of times a product has been abandoned and recovered:

8. ABANDONED ORDERS
↑ Back to topThis section displays the details of Abandoned Orders. These details include information about the customer, their cart total, abandoned date and time, and their Cart Status:

To conclude, this is the overview of the responsive Dashboard of our Abandoned Cart Pro for WooCommerce plugin.
Please keep a note that the abandoned cart stats, email stats, and graphs will be displayed as per the selected date range.
Abandoned Orders
↑ Back to topThe Abandoned Cart Pro for WooCommerce plugin has an Abandoned Orders listing tab to display all the abandoned orders that have remained in the cart for a time higher than the “Cart abandoned cut-off time” setting.
The Abandoned Orders List page will look like this:


The abandoned Orders List has the following items:
- ID
- Email Address
- Customer Details
- Order Total with Quantity
- Abandoned Date / Time
- Coupon Used / Status
- Captured By
- Cart Status
- Filters
- Bulk Actions
- CSV and Print
1. ID
↑ Back to topThis displays the ID number of the abandoned cart. For instance, you have Ids such as #181 and #180:

2. Email Address
↑ Back to topThis shows the email address of the customer. For abandoned order id #181 it is nidhi@tychesoftwares.com.

2. a) Updating Email Address
Here, the site admin has the option of updating the user’s email address entered on the site before abandoning the cart. Let’s take the example of the following abandoned cart:

To update the email, click on the ‘edit’ icon displayed in the above image. Once you click on it, a window will appear where you can make the changes to the email address. For instance, you can change the email address to priyanka10@tychesoftwares.com and click on the ‘Update Email Address’ button.

After updating the email address, you will be able to see this change on the Abandoned Orders page as such:

2. b) View Order
In order to view the cart details of the specific cart, click on the ‘View’ button as shown below:

Once you click on it, it will display all the further details of the abandoned cart such as item name, item cost, and item quantity. This icon will be displayed at all times.
Here, you can even send a custom email to this customer or Unsubscribe from getting notified about updates related to this order.

2. c) Mark As Recovered
The ‘Mark as Recovered’ setting will be displayed only when the cart status is not set to recovered.

Once you click on it, you can enter the original WooCommerce Order ID and click on search.

The Order Id that’s being asked here is the Order Id of the corresponding recovered order for that particular abandoned order.
You will find this Order ID in the URL of the Edit Order Page of the order you need to Mark as Recovered.
For eg, after entering 148 and clicking on the Search button, the WooCommerce Order would show as such-

After finding the WooCommerce Order, you can click on the ‘Mark as Recovered’ button.
Once this is done, you will find that the order has been recovered on the Abandoned Orders page. This is how it will appear-

You can also recover the cart with a new WooCommerce Order number which will be marked as recovered. Simply choose ‘Create a WooCommerce Order’ for this and click on ‘Mark as Recovered’:

This order will be recovered with a new WooCommerce Order ID.
2. d) Unsubscribe
The ‘Unsubscribe’ button can be used to simply unsubscribe the abandoned order as shown below:

This option will be displayed only when the cart status is not set to unsubscribed.
After clicking on the icon, you will see the status of the cart as follows:


If you wish to have custom landing pages when a customer unsubscribes from receiving abandoned cart emails, you can take a look at our Unsubscribe Landing Pages feature here. Also, have a look at these different effective examples of unsubscribe pages.
2. e) Send Custom Email
You can use the ‘Send Custom Email’ setting to send a reminder email to your customer about their abandoned order.

Once you click on the setting, it will take you to the Templates page where you will find different settings to customize your email.
It will specifically be sent only to the selected abandoned order. In this case, it is for abandoned cart Id 19.
If you wish to use one of the existing email templates, then choose one from the dropdown, for instance, the Initial Template.
Make any changes in the content, subject, Header, Coupon code, etc. Click on the ‘Send Email’ button once done:


The customer with the abandoned cart Id 19 will thus receive the following custom email:

2. f) Trash
The Trash option lets you send that abandoned order to the Trash folder.

After clicking on it, the following banner will be displayed:

Click on OK to proceed. You will receive a final message letting you know that the selected abandoned order was moved to the Trash folder:

A. Restore function
When you go to the Abandoned Orders tab > Trash and mouse hover on the trashed item, you will see 2 options Restore and Delete permanently.

When you click on the Restore option, this item will be restored back to its original place which is back to the Abandoned Orders list. A message will be displayed confirming the item has been restored and that entry will no longer be seen under the Trash folder as shown below:

Thus the item is restored back to the Abandoned Orders list as shown below:

B. Delete Permanently function
When you click the Delete Permanently function instead of Restore, this item will be deleted permanently and will not be seen under the Abandoned Orders list or Trash folder.
This shows the 1st entry in the Trash folder was deleted permanently.

A confirmation message will be displayed:

Following this, the successful deletion of the cart will be shown with a message. You will also see the change reflected in the orders of Trash and All tabs.

Please note: The above-mentioned two functions can be applied to both Abandoned Orders and Recovered Orders alike.
Let’s now look at the changes that will take place in the Product Reports Tab when Abandoned Orders and Recovered Orders are sent to Trash.
Product Reports Tab for Abandoned Orders
This is the Product Report for Art.

You have now decided to move the following Abandoned Order to the Trash folder:

When this is moved from the Abandoned Orders Tab to Trash, then it will affect the ‘Number of Times Abandoned’ column under the Product Report Tab.

Product Reports Tab for Recovered Orders
Similarly, let’s say that now you have decided to move the following Recovered Order to the Trash:
This change will affect the ‘Number of Times Recovered’ column under the Product Report Tab.

This implies that this tab gets affected by changes when items are moved to trash for both instances.
3. Customer Details
↑ Back to topNext, we have the Customer Details section which displays all the necessary information about our customers. Let’s have a look at the below image first:


Let’s start with #26. Under Customer Details, you can see the words Visitor Guest being displayed. This implies that someone had added items to their cart however, they did not complete the purchase. It also tells us that this person has not entered any of the details such as first and last name, contact number, etc.
In #25, you will find that it is named as Guest. This is because the customer’s email address has been captured by the plugin.
In #23, you find that the Administrator has abandoned an order. Thus, the admin’s First Name, Last Name, Contact Number, and designation, i.e. an Admin is mentioned.
Id #19 shows that it’s a Guest who has entered all their details such as First Name, Last Name, and Contact Number.
If you look at #17, you can also see a small Facebook messenger icon. This icon implies that this particular cart was captured with the help of Facebook Messenger. If you wish to set up and integrate the plugin with Facebook Messenger, you can read about it here.
4. Order Total with Quantity
↑ Back to topNow, in the below image, we can see that abandoned order ID #19 had 1 item worth $60 to be purchased. Similarly, #23 had 1 item worth $160.
So, under the Order Total section, you will get to see the total amount of the order as well as the number of items that were added to the cart by the customer.

5. Abandoned Date / Time
↑ Back to topSince the items were not purchased within the ‘Cart abandoned cut-off time’, the cart became abandoned on 29th May 2023 at 10:15 am as shown below:

The Abandoned Date section thus displays the date as well as the time when the order was abandoned.
Here if you want, you can change the date and time format in which the Abandoned Orders will be listed. This can be done from WordPress Settings > General Settings page as shown below:

You can change the date and time format as per your requirement so that they’re reflected in the Abandoned Orders tab as shown below:

Similarly, you can use the WordPress settings for language as well according to the change you want. Using WordPress settings for date, time, and language ensures uniformity with the site.
6. Coupon Used / Status
↑ Back to topYou can check the coupon used by the customer from the ‘Coupon Used/Status’ column. The status of the coupon code, whether the customer used it or not will be displayed in this column.
For instance, an email was sent to the guest user along with the coupon code. The customer used this code and successfully placed an order. The status of this coupon code will thus show ‘Successfully applied’

This implies that the user clicked on the reminder email link to checkout which is why the coupon code was applied to the cart automatically. As a result, the cart was recovered.
If a coupon code has not been sent to the customer or it hasn’t been used by the customer, then the column will appear blank.
7. Captured By
↑ Back to topThis column will state how the abandoned cart was captured. An abandoned cart can be captured through several ways such as – Add to Cart Popup, Exit Intent Popup, or through the customer filling in their details on the Checkout Page under User Profile.
Depending on how the cart was captured, it will be displayed here:

8. Cart Status
↑ Back to topThe Cart Status column will display different statuses such as Abandoned, Unsubscribed, Abandoned – Pending Payment, Abandoned – Order Cancelled, Recovered, and Abandoned – Order Received.
8. a) Abandoned
The Abandoned status implies carts that were not purchased by the customer and got abandoned after the cut-off time specified.

8. b) Unsubscribed
The Unsubscribed status will be displayed for those abandoned carts whose customers have opted to unsubscribe from receiving the abandoned cart reminder emails.

Once a cart gets abandoned, the customer receives a reminder email notification detailing the abandoned order and a link to unsubscribe as shown below:

When a customer clicks on the unsubscribe link, they will not receive any future reminders for that order and the status of the abandoned order will change to Unsubscribe.
8. c) Abandoned – Pending Payment
The Abandoned – Pending Payment status will be displayed when an order is placed from the front end, however for some reason the order is left in a Pending Payment state.

For instance, if the customer chose to pay through Paypal where the Paypal page was opened, however, they left the site without completing an order. Here Pending Payment refers to the WC Order status.
8. d) Abandoned – Order Cancelled
Once the Hold Stock limit is reached, WooCommerce will cancel the order, i.e. update the order status to Order Cancelled.

The Admin will need to add a setting for Hold stock (minutes) under WooCommerce > Settings > Products > Inventory as shown below:

Here when you add 30 minutes in the Hold stock setting, the unpaid order will be kept on hold for 30 minutes and then declared as abandoned. In that case, the cart status is updated to Abandoned – Order Cancelled.
8. e) Recovered
The ‘Recovered’ status is displayed for abandoned orders which were purchased by the customer after they were intimated of the abandoned order via email from the plugin.

The ‘Recovered’ status will appear when the customer completes their abandoned cart by clicking the link in the abandoned cart reminder email and making the purchase.
Thus, the cart will be considered a Recovered cart and its complete details like customer details, cart abandoned date, cart recovery date, and time and order total will be displayed.
8. e) Abandoned – Order Received
Let’s say that a user has placed an order recently on the site and they have abandoned another cart.

In such a case, if the store owner does not want to send the reminder email immediately then the plugin has a setting called “Send reminder emails for newly abandoned carts after X days of order placement”. You can find it by going to Abandoned Carts > Settings page.
It allows the site admin to set the number of days after which a reminder email should be sent for a newly abandoned cart since the last order placed by the same user.
This cart will therefore show the status “Abandoned – Order Received”.
8. f) Integration with Email Marketing Services
Additionally, if you have successfully integrated the plugin with any of the email marketing services such as Mailchimp, Klaviyo, Mailjet, or CRMs like Hubspot, then, another icon will also be visible to you.
For instance, let’s say the plugin is connected to Mailchimp. In the image below, you can see that the Abandoned order ID #29, is a cart that was abandoned and its information was sent to your Mailchimp account. That’s why the Mailchimp icon is visible:

If this cart hasn’t been exported to your Mailchimp account, then the icon will appear lighter in shade as shown in the above image for order #28. You can export individual carts by clicking on the ‘Sync Manually’.

Once synced, you will receive this message:

Your cart will thus be synced showing the icon in a brighter shade:

9. Filters
↑ Back to topWe provide the different filters on the Abandoned Orders tab of our plugin. By utilizing various filters, you can access information about abandoned and recovered carts for specific timeframes.
Start by selecting the number of days from the first dropdown menu.

Then, specify your desired start and end dates. Next, choose the type of cart information you’d like to view.

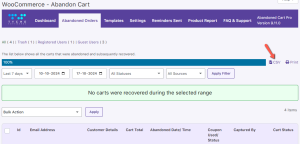
For example, if you’re interested in the details of carts that were abandoned over the past 7 days. Also, if you want to see from where the cart is captured, then you can select the option from the “All Sources” filter as per your requirements. You can simply apply these filters by clicking on ‘Apply Filter.’ You will then see all relevant information displayed in the table below.


Additionally, a banner will appear showing the total number of carts recovered and their total value within the selected timeframe.
10. Bulk Actions
↑ Back to topFrom the order list, you can carry out Bulk Actions such as sending Custom Email, Moving to Trash and so on. Firstly, tick the check box of items/carts to which you wish to apply these bulk settings to, and then click on ‘Bulk Action’.
Select the action option from the dropdown and click ‘Apply’. Here’s a look at all the Bulk actions that you can carry out:

If you want to apply these bulk actions to All Orders in one click then tick the check box in the menu bar. Here’s how the checkbox will be in the menu bar:

Choose any of the bulk actions from the dropdown of the ‘Bulk Action’ option as shown above. Click on ‘Apply’.
11. CSV and Print
If you want to take a print of this cart list for future reference, you can do so by clicking the ‘Print’ button.

You can also get an Excel format of the cart list by clicking the ‘CSV’ button.

Thus, the Abandoned Orders list is a key area in the Abandoned Cart Pro for WooCommerce plugin which helps you to keep track of all the abandoned carts along with their abandonment details and status.
Prices Including or Excluding Taxes
↑ Back to topIn an increasing demand for online shopping in today’s era, you will find that all transactions are carried out online. The shop owners now feel the need to include taxes on the purchases made.
For this, we have added a feature that allows you to decide if you want to display the order total amount with or without taxes by selecting the including or excluding taxes option from WooCommerce settings in Abandoned Cart Pro for WooCommerce plugin.
Firstly, you need to enable taxes from WooCommerce > Settings > General > General Options. Tick the checkbox for Enable taxes option as shown below:

Tick checkbox for Enable taxes
You will now see how to display Order total of the selected product, including tax and excluding tax.
Including Tax
↑ Back to topGo to WooCommerce > Settings > Tax > Tax Options.
Here you can select the option in Prices entered with the tax setting as shown below:

Prices entered with tax option
If you want that the prices on the site should be displayed including tax, then select the option Yes, I will enter prices inclusive of tax.
Also, you will have to change the Display prices in the shop and Display prices during cart and checkout options to Including tax from the drop-down, as shown in the above screenshot.
When you opt to show the price inclusive of taxes, the price of the selected product will appear with the tax on the Cart page as shown below:

Cart total shows tax included
The Cart total shows $500 (includes $83.33Tax). When you select the option to display prices including taxes, this is how it will appear.
Similarly, this will reflect on the Checkout page as shown below:

Checkout page also displays the total amount including tax
The total amount on the Checkout page under Your Order section also shows the tax amount included as shown above.
Moreover, when a shopping cart gets abandoned, the abandoned cart reminder emails will show the price of the product with the included taxes as well, as shown below:


Abandoned cart reminder email showing cart total including taxes
You will also find the taxes shown under the Abandoned Orders tab where the list of all abandoned orders is displayed in the Order Total column as shown below:

Order total is shown with taxes included on Abandoned Orders tab
When you click on CSV button, the same details will be displayed on an Excel sheet with Order total shown including taxes:

CSV file showing Order total with taxes included
Additionally, when you click on the View button under the Abandoned Orders tab, you can view details of the abandoned order with the Order total showing taxes included as shown below:


View the details page showing the order total including taxes
You can also get the details of the order total including taxes on the Reminders Sent tab as shown below:

Mouse hover on the email address
When you mouse hover over the email address, you will see the Abandoned Order link. When you click on it, a popup modal will appear showing the Cart details and the total with taxes included, as shown below:

Details are shown on the popup modal
In this way, you enable the option of including taxes to be shown with the Order total.
The details would reflect at many places on the site and backend like the Cart page, Checkout page, Abandoned Cart Reminder emails, Abandoned Orders tab, View details popup of Abandoned Order, CSV details of the abandoned order, and Sent Emails tab.
Excluding Tax
↑ Back to topThe Order total can also be displayed excluding the tax applied. For this, go to WooCommerce > Settings > Tax > Tax Options.
Here you can select the option in Prices entered with the tax setting as shown below:

Enable the option to display prices excluding tax
If you want the prices on the site should be displayed excluding taxes, then select option No, I will enter prices exclusive of tax.
You will also have to change the Display prices in the shop and Display prices during cart and checkout options to Excluding tax from the drop-down, as shown in the above screenshot.
When you opt to show the price exclusive of taxes, the price of the selected product will appear excluding the tax and the tax will be added separately in the Order Total on the Cart page as shown below:

Tax has shown on the Cart page
As you can see, the Cart total shows $500, and tax of $101.65 is added separately, thus making the Order Total $601.65 So when you select the option to display prices excluding taxes, this is how it will appear.
Similarly, this will reflect on the Checkout page as shown below:

Prices are shown excluding taxes on the Checkout page
The total amount on the Checkout page under the Your Order section also shows the tax amount calculated separately as shown above.
Moreover, when a shopping cart gets abandoned, the abandoned cart reminder emails will also show the price of the product with the excluded tax as shown below:

Price is shown with tax added in the reminder email
You will find the taxes shown under the Abandoned Orders tab where the list of all abandoned orders is displayed. The Order Total will show the tax separately as shown below:

Order total showing tax calculated separately
Also, when you click on the More Info icon, you can view details of the Abandoned order in a popup modal. Here Item cost is displayed and tax is calculated separately as shown below:


View details page showing Item cost excluding tax
You can also get the details of the Item price excluding tax on the Sent Emails tab as shown below:

Mouse hover on the email address
When you mouse hover over the email address, you will see the Abandoned Order link. When you click on it, a popup modal will appear showing the Cart details, the Item cost, and tax separately as shown below:

Order details shown on the popup modal of Abandoned order
This way when you enable the option of excluding taxes from the product price, these details would reflect at many places like the Cart page, Checkout page, Abandoned Cart Reminder emails, Abandoned Orders tab, View details popup of Abandoned Order, and Sent Emails tab.
In conclusion, using this post, you choose to display the Total price inclusive of taxes or excluding taxes using the Abandoned Cart Pro for WooCommerce plugin. It will help you decide a way in which the products should be sold online to attract more customers.
Templates
↑ Back to topEmail Templates
↑ Back to topReminder email templates in the Abandoned Cart Pro for WooCommerce are a predesigned set of templates with default settings and reminder timings to help you easily start the abandoned cart recovery campaigns.
Here’s what you’ll find on this page:
A) Default Email Templates
B) Email Template Stats Table
C) Editing an Email Template
D) Sending an Email Template
Let’s learn how to use these settings and features.
A) Default Email Templates
↑ Back to topYou will find five default email templates:
- Initial
- Interim
- Final
- Review Reminder Template
- Coupon for Next Purchase
These appear under the Email Templates tab as shown below:

The main difference between them is the time interval, the period after which an abandoned cart email will be sent to the customer.
Initial – Reminder email will be sent 15 Minutes After Abandonment
Interim – Reminder email will be sent 1 Hour After Abandonment
Final – A reminder email will be sent 24 Hours After Abandonment. There is a discount code associated with the Final template that gives a 10% discount on the Cart Total (by default)
Review Reminder Template – This will be sent 7 days after the WooCommerce Order status change
Coupon for Next Purchase – This will be sent 30 days after the WooCommerce Order status change
You can easily activate or deactivate the email templates as per your requirements. Enable the Start Sending option (It will turn green in color).
In the above example, all the templates are active which means the reminder emails will start sending to the customer after 15 minutes of cart abandonment.
B) Email Template Stats Table
↑ Back to topLet’s have a look at the Email Template Stats Table and the information you can infer:

i. Name of the template
This displays the name of the template. For instance, Initial Template.
Here, you can also make changes to individual templates by simply hovering the mouse over the name of the template. This will provide you with different options such as – Editing the template, Duplicating it, or Deleting it.

ii. Sent After Set Time
This is where you will set a time after which the abandoned cart reminder email will be sent to the customer. For instance, it can be 15 Mins after abandonment.
iii. Send To Segment(s)
This section displays the specific customer or group of customers to whom the reminder email will be sent on cart abandonment. In this case, it will be sent to all the customers.
iv. Number of Emails Sent
This will display the total number of reminder emails sent to the customer.
v. Open Rate
This is the % of the open rate of the reminder emails. It implies the number of times the reminder emails were opened by the customers when these were sent upon cart abandonment.
vi. Link Click Rate
This is the % of the click rate of the reminder emails. It implies the number of times the links for the checkout page or cart page were clicked by the customers provided in the abandoned cart reminder emails.
vii. Coupon Redemption Rate
This will display the % of the coupon codes applied to carts when the checkout links sent in the reminder emails are clicked.
viii. Conversion Rate
This is the % of the recovery rate of the reminder email templates that have been sent. It is calculated based on how many customers have completed their purchases using the link provided in the reminder emails. This will help you understand which email template performs better and convert abandoned cart users. It
ix. Start Sending
This shows if the template is currently active for sending reminder emails. If the template is active, it will be enabled and turned to a green color. If it is Inactive, then it will not be enabled.
*Important: This is a highly sensitive area as any changes that will occur on the “Reminders Sent Tab” like trash and restore activity, those actions will affect the stats on this page as well.
x. Bulk Actions
In order to delete multiple templates with just one click, you can use the Bulk Actions option. Simply select the specific templates, choose ‘Delete‘ from the dropdown, and click on the ‘Apply’ button as shown below:

C) Editing an Email Template
↑ Back to topHere you will find all the elements that make up the email template.
Let’s have a look at the Initial Email Template:

Please note that the default email templates will have some settings configured already. You may make changes to them according to your needs.
1) Match Rules
Based on your selection of “Match all rules” OR “Match any rules” the rules set will be applied.

“Match all rules” will allow you to send the email template when all the rules are added. “Match any rules” will allow you to send the email when any one rule matches.
2) Rules
Here, you can add different rules based on the different conditions in the email templates. This feature will trigger the email templates to target abandoned carts that meet different criteria. You can add single or multiple rules using this option as per your requirements.

This Rules feature has four main columns – Rule Type, Conditions, Values, and Actions.
a) Rule Type
Choose the Rule Type in this section.

You will 11 rules in the dropdown as shown here:

b) Conditions
Set the condition of the rule in this section. You can choose to include or exclude certain categories. You can even decide whether the value should be less or greater than something.

c) Values
These values will depend upon the Rule that has been selected by you.
Example 1: Send Emails to
If you go with the Rule Type ‘Send Emails to’ then under Values, you get to choose options that will allow sending the email template to All, Customers, Registered Users, Guests, Admin, Customers & Admin, and to one or more specific email addresses when the cart is abandoned.


You can select any of them as per your requirements. For instance, if you choose Email Addresses, then enter the email address and click Save Rule.

If you select only registered users here then the email template will be sent only when a registered user’s cart is abandoned.
Example 2: Cart Items
The Cart Items rule type will be applied when the selected products may or may not be present in the customer’s cart.
For instance, you have added the product Sweater under the Values field by clicking Save Rule.

You can add more than one product in the field. Enter the initials of the product and click the Update button to save it.

d) Actions
The last column titled Actions will have options such as Save Rule, Update, Edit, and Delete.
You have already seen how the Save Rule and Update options work.

The Edit option will let you edit the rule type, while the Delete option will let you delete the rule.
3) Template Name
You need to give a name to this template which is written in this field. This name will be displayed on the Email templates listing page to identify the templates by the name.

For the default Initial template, the name will be Initial Email Template.
4) Send this email
You have to select the time in minutes, hours, or days from the drop-down for this template. This means after the cart is abandoned, the reminder email will be sent to the selected segments after the time that is specified in this field.

Hence in the above example, the email will be sent 15 minutes after the cart is abandoned.
5) Subject
In the Initial Email Template, you will find the subject of the reminder email is by default ‘Hey {{customer.firstname}}!! You left something in your cart.’
Here, the first name of the customer will be replaced with merge code {{customer.firstname}}, For instance, if the customer’s first name is John, the subject line will be ‘Hey John!! You left something in your cart.’

You can change this subject as required. Make sure to have a good subject line that induces the lost customer to feel like opening the email in the first place so as to make them proceed towards making the transaction.
6) Email Body
Fill the Email Body with the email content that gives details of the abandoned cart. It first addresses the Shop Name using a merge code with some responsive email content as shown below:

Then, it will display the cart details like the name of the product, product price, checkout link, contact number, etc.
You can customize the email body depending on what you wish to highlight in the mail that will force the customer to come back to the store to complete the purchase. For this, the different items that are provided for the email content can be used as follows:

6. a) Add Media
This will add an image to the email body that’s saved on the computer or device you are using.
The product image can also be resized by admin using the Product Image setting which is located under Abandoned Carts -> Settings > General tab. The contents are as shown below:

Remember, the default image size is 150 x 150.
6. b) Insert Template
This lets you insert a template from the 11 in-built templates offered:

Simply select the template and insert it! You can also preview the selected template by clicking on the search icon available on the template.
6. c) Import Template
You can also import third-party/external templates. Choosing this option will let you upload your template:

Once uploaded, click the Import this file button. You can also preview the selected template by clicking on the search icon available on the template.
Similar to the Insert Template option, even in this option, there are merge tags added by default. Only the logo and images need to be replaced if required which can be done by clicking on Add Media button and adding the appropriate images.
6. d) Import Contact Form
If you wish to attach a Contact Form to your Reminder email, then you can select his setting to import your Contact Form:
6. e) Text Editor
The Text Editor comes with some basic text editing options such as bold, italics, numbering, indentation, underline, strikethrough, placement of text or paragraph, justifying the paragraph, etc.
However, the 2 most important items introduced in this plugin are ‘AC’ and ‘Buttons’ dropdowns.
The AC dropdown gives a list of merge codes that can be used in the email body whereas Buttons show a list of different types of buttons that can be explored.
1) AC dropdown- Merge codes
Below is a list of Abandoned Cart Pro merge codes that can be used for specific items under the AC dropdown:

Example 1: Product Name
If you want to have the Product Name displayed, click Product Name from the drop-down list. When it gets added to the email body, the actual product name in the abandoned cart will be picked and displayed in place of this merge code.
For instance, if a product name in the abandoned cart was “Red bag”, the Product Name merge code will automatically fetch the product name and place it on the email. It saves you time and also helps you send personalized messages.
Newly added merge codes {{customer.phone}}, {{admin.phone}} and {{store.address}} when used are replaced with the customer’s phone number, admin’s phone number, and the store address that is set on the WooCommerce > Settings page, respectively.
Note that the admin’s phone number needs to be added manually and shall be replaced with real-time data in the abandoned cart reminder emails.
Example 2: Upsells and Cross-sells
WooCommerce allows you to add Linked Products to all our products. You can set up Upsells and Cross-sells by going to WooCommerce > Products > Add/Edit Product > Product Data > Linked Products tab to suggest better or similar products and other addons that are frequently bought together.
In this case, for the product Gothic Venetian Harlequin Halloween Costume, you can add the following Upsells and Cross-sells:

These merge tags are available as a dropdown of the AC button as shown below:


Once you insert the merge tag, a text similar to the one below will be added to the email template. This text can be modified to best suit your needs.

Such extra parameters present in the merge tag help you customize the look and feel to best suit your needs.
The plugin not only allows you to display images of the linked products, but it also adds ‘Add to Cart’ buttons for each of these to enhance the overall user experience. The user can simply click on the button and the chosen product will be added to the existing cart which makes it easier for the user to complete the checkout process.
What do these extra parameters mean?
The merge tags have 4 parameters present as below:
- add-to-cart: Button text to be used for the ‘Add to Cart’ button
- button-color: Background color for the button
- text-color: Color of the text displayed in the button
- items: Number of items that should be displayed in each row for the linked products.
How does it appear in the emails?
As always you can send a test email or view a preview of the email template. Below is an image of a reminder email containing both upsells and cross-sells.


2) Buttons dropdown
The Button’s dropdown has 2 items – Cart Button and Checkout Button. These are used at the end of the email content as per the requirements.

These CTAs will help the customer quickly resume completing the purchase. The cart button will take them to the cart page and the checkout button will take them to the checkout page.
You can refer to this link to know what should be included in your abandoned cart emails to show better results.
7) Use WooCommerce Template Style
Here you have 2 options to preview the email to be sent, one is the WooCommerce Style template and the other is the Custom Email template.

To choose any of these templates, click on the buttons shown above namely Preview WooCommerce Email and Preview Custom Email.
If you click on the Preview WooCommerce Email, then the abandoned cart reminder email will appear in the popup modal as shown below:

The ‘Send a test Email’ section can be used to send a test WooCommerce email to the email address you will enter in the field.
If you click on Preview Custom Email, then the reminder email will appear in the popup modal as shown below:

These previews give you an essence of how the email will appear to the potential customer as it takes the details of the last order placed.
8) Email Template Header text
Any sentence typed here appears on the header of the template which is the purple band as shown in the Preview WooCommerce Email. By default, it is ‘You left something in your Cart!’ for this template.

This is only applicable when the ‘Use WooCommerce Template Style’ is checked.
9) Coupon Codes
Here, you can either generate unique coupon codes OR enter a previously set coupon code into your email template.
9. A- Generate Unique Coupon code
In order to generate a unique coupon code, you will have to configure the following settings:
Firstly, enable the Generate unique coupon code setting.

Choose the Discount Type. You can create a percentage discount or choose to go with a fixed amount discount:

Enter the Coupon Amount. For instance, if you have entered 10 and selected Percentage Discount, then the customer will get a 10% discount. If you have selected the Fixed Cart discount, then the person will get a $10 discount.

Decide whether you wish to allow your customer free shipping along with the coupon code. Next, set the Coupon validity to a particular time.
Lastly, decide whether this coupon will be permitted to use only once or not. Enabling the ‘Individual use only’ setting will ensure that the customer cannot use this code with any other offers.
Once done, your unique coupon code will be generated for this email template. It will be displayed under WooCommerce > Marketing > Coupons.
Important Notes:
- The plugin provides {{coupon.code}} merge tag for the coupon code. This merge tag needs to be added to the content of the email template. The unique coupon code will thus replace the merge tag in the reminder email that’s sent to the customer.
- If a new email template is made and you want to offer a discount to the customers, then you need to add the coupon code settings to it. If you are using the default templates (Interim / Final), then you do not require to do any settings because the plugin will automatically generate 5% for ‘Interim’ and 10% discount codes for the ‘Final’ email template.
- If you wish to overwrite the Default email templates coupon codes then you can enable the Generate Unique coupon codes setting.
Where can I check the coupon code status?
After an abandoned cart reminder email has been sent to the customer and once the customer clicks on the link provided, then it means that the coupon code has been used.
In order to check if the coupon codes have been used or not, you will need to go to the Abandoned Orders tab and check the columns ‘Coupon Code Used‘ and ‘Coupon Status‘ as shown below:

Coupons Deletion
When you go to Abandoned Cart > Settings > General > Coupon setting, you will find two coupon settings named ‘Delete Coupons Automatically’ and ‘Delete Coupons Manually’.

The setting ‘Delete Coupons Automatically’ will allow the store owners to automatically delete the expired and used coupon codes every 15 days.
If you want to manually delete these expired and used coupon codes then you can click on the Delete button provided for the ‘Delete Coupons Manually’ setting.
9. B- Enter a coupon code to add into the email
Here the coupon codes have a significant role as these are a tool for converting non-purchasers to purchasers. You can make unique coupon codes by selecting the parent code.
In order to make a coupon code, you need to go to Marketing > Coupons tab > Add Coupon button as shown below:

Now enter the name for the coupon code, select the discount type, the coupon amount, and its expiry, etc. Lastly, press the Publish or the Update button. Your coupon code is created.
For instance, you can create a coupon with the name ‘tested’ and assign a 10% discount to it as shown below:

When you have to assign a coupon code to the email template, all you need to do is type the first 3 characters as shown below for ‘tested’ coupon.

Select it from the dropdown and voila, you’ve added a 10% discount to this email template.

10) Send a test email to
Entering an email address in this field will let you send a test email for this template before you send it to your customer.

In this manner, you can verify the email and confirm the contents before it goes to your customer.
Once all the changes are made on the Edit email template page, you need to click the ‘Save Settings’ button to save all the changes made to it.

D) Sending Email Templates
↑ Back to topThere is a setting that runs in the background where the selected email template will be sent to customers for only those carts which are abandoned after the template is created. The existing abandoned carts will not be associated with the newly created email template.
For instance, if a new template named Recovery Email is created, then the email notification for all abandoned carts after this template was created, will receive this mail.

In the above image, you can see that this template has been enabled after its creation.
If a cart was abandoned after this email template was created, then that user will receive an abandoned cart reminder email after 30 minutes of her cart abandonment using the Recovery Email template.
To summarise, this setting automatically sends newly created email templates to all the abandoned carts which are captured after the template is created and not to the already existing abandoned orders.
Conclusion
↑ Back to topWith the Abandoned Cart Pro for WooCommerce plugin, you are provided with every possible option to the email template by default without having to worry about how will you pull your potential customers to the store.
Additional Information
↑ Back to topGeneral Settings of Abandoned Cart Pro
Where can I find the list of abandoned carts of customers in my WooCommerce store admin?
Where can I find the list of abandoned carts of customers in my WooCommerce store admin?
You can find the Abandon Carts under WooCommerce > Abandoned Carts > Abandoned Orders page. All the plugin settings, including list of Abandoned Carts, emails sent, recovered carts, etc. are contained here. The only thing not present on this page is the Dashboard widget, which will show up on your WordPress admin dashboard.
When would a customer’s cart be considered as abandoned?
When would a customer’s cart be considered as abandoned?
For all users, the cart is considered as abandoned after the set cut-off time has passed. The default value for this is X minutes.
For a logged-in user, the cart is tracked right after the product is added to his cart. It is considered abandoned as soon as the cut-off time has passed since adding the product to cart. Whereas, for a guest user, if Add to cart popup modal is enabled then the cart will be abandoned once the email address is entered in popup modal. If Add to cart modal is disabled then the cart can be abandoned only after the guest user reaches the checkout page and mentions his first name, last name, phone number, and email address.
How do I setup the Abandoned Cart Settings?
How do I setup the Abandoned Cart Settings?
You will find all the Abandoned Cart plugin settings in WooCommerce > Abandoned Carts -> Settings page. They are divided into 4 categories, namely General Settings, Add To Cart Popup Editor Settings, Email Sending Settings & Restriction Settings.
How can I offer discount codes to customers in the abandon cart reminder emails?
How can I offer discount codes to customers in the abandon cart reminder emails?
When you add or edit an email template, it has a “Enter coupon code to add into email” Here you need to enter a coupon code that you have created from WooCommerce > Coupons page. You would also need to add the {{coupon.code}} merge tag in the Body section of the template. This will send the same coupon code to all customers to whom that abandon cart email is sent to. If you want to send a unique coupon code to each customer, then you need to enable the “Generate unique coupon codes” setting. In addition, you still need to enter a parent coupon code in the “Enter a coupon code to add into email” setting. The unique coupon codes will be generated based on the settings added for the parent coupon code.
What would happen when an order is claimed by the user?
What would happen when an order is claimed by the user?
When an order is claimed, it is removed from the Abandoned Orders list and moved to Recovered Order tab under WooCommerce > Abandoned Carts. No further emails will be sent to any customer who has already claimed their abandoned cart.
Can I know which customers have received the email or which email have been sent?
Can I know which customers have received the email or which email have been sent?
Yes. You can view which email templates are sent to which customers from the Sent Emails tab. You can also view which customers have opened the email. Alternatively, for email sent to customers, you can also send a copy of it to the site admin or to an external email address too. This can be done from the add/edit email template page in the “Send the Abandoned cart emails to:” field.
How does the Abandon cart plugin send out the cart recovery emails? Do I need a special setup?
How does the Abandon cart plugin send out the cart recovery emails? Do I need a special setup?
Our plugin uses the WP-Cron which will send the abandoned cart reminder email to customers automatically. The email sending is done at every 15 minutes. If you want, you can change this interval from the “Setting for sending emails using WP Cron” under “Email Sending Settings” page in Settings.
I have a few abandoned carts. But why is the abandoned cart email not sent to those customers?
I have a few abandoned carts. But why is the abandoned cart email not sent to those customers?
There are several reasons abandoned cart reminder emails not being sent from your website. It could be that WP-Cron is disabled on your site, or your server has some restrictions which does not allow WP-Cron, or the emails are actually sent, but the email server has failed to deliver them to the recipient. If you see the emails under the “Sent Emails” section but if they are still not being received, then it’s likely a problem with your email server. You can contact your web host about this.
The test emails have wrong or dummy data. Is it supposed to work this way?
The test emails have wrong or dummy data. Is it supposed to work this way?
Yes, that is dummy data. The merge tags in the email template are replaced with the data of the store, like admin email address, two simple products of the store and other information are fetched and replaced with the merge tags. When the actual abandon cart recovery emails are sent out, these merge tags will be replaced with the customer’s cart data.
I don’t want to use WP-Cron on my site. Is there an alternate way to send the abandon cart emails automatically at regular intervals?
I don’t want to use WP-Cron on my site. Is there an alternate way to send the abandon cart emails automatically at regular intervals?
Yes, you can setup a manual cron in your server’s administration panel. For example, if you are using cPanel, it has a section Named as “Cron Jobs” which allows you to create the cron job.
/usr/bin/wget -q -c {your_site_path}/wp-content/plugins/woocommerce-abandon-cart-pro/cron/wcap_send_email_using_cron.php
How does the Add To Cart Popup Modal work?
How does the Add To Cart Popup Modal work?
Once the customer clicks on the add to cart button, our plugin opens the popup modal for capturing the customer’s email address. If the email address capture is set to be mandatory in admin, then the popup modal will close if the email address is not provided by the customer & the item will not be added to cart. Once the email address is provided by the customer, only then the product will be added to the cart. The email capture can be set as non-mandatory, which means that the popup to ask for email address will be displayed, but the customer can simply click on the “No thanks” button & proceed to adding the item to the cart.
Why does the Add to cart popup modal not show when I click on Add to Cart? I have all the settings done correctly.
Why does the Add to cart popup modal not show when I click on Add to Cart? I have all the settings done correctly.
If you are using custom buttons for Add to Cart, then the popup won’t appear. The Add to Cart popup appears with the default Add to Cart buttons. It is also possible that you are using the Add to Cart button on a custom page & not one of the default pages like WooCommerce’s shop page, product page, category page and on the home page. You can contact our support team to get this resolved as each custom button needs a different solution.
For multi-lingual websites, can your plugin send email templates to customers in the language in which the cart was abandoned when browsing the website?
For multi-lingual websites, can your plugin send email templates to customers in the language in which the cart was abandoned when browsing the website?
Yes, our plugin is compatible with WPML. You can send the abandoned cart reminder emails in different languages using WPML. Our plugin will send the abandoned cart reminder emails in the respective language in which the customer has abandoned the cart. You can learn more about it here.
Is your plugin compatible with Multicurrency as I wanted my site to be available in multiple currencies?
Is your plugin compatible with Multicurrency as I wanted my site to be available in multiple currencies?
Yes, our plugin is compatible with Aelia multicurrency switcher plugin. We have an addon Aelia Currency Switcher addon for WooCommerce Abandoned Cart Plugin. It will send the abandoned cart reminder emails in the same currency in which customer had abandoned the cart.
How do I configure the plugin for WordPress multisite?
How do I configure the plugin for WordPress multisite?
You have to just upload the plugin and in network settings, check the option to enable plugin management, and then from each individual site you need to activate it.
Does your plugin comply to the GDPR guidelines ?
Does your plugin comply to the GDPR guidelines ?
We have made every effort to make our plugin compliant to the GDPR guidelines. As a part of compliance we do not capture any data of end users and customers without consent.
Questions & Support
↑ Back to topI have another question.Please fill out this pre-sales form.
e