The General Settings section in the Abandoned Cart for WooCommerce plugin gives you access to the following settings:
1. Email Settings
↑ Back to top2. Cart Settings
↑ Back to top3. Settings
↑ Back to top4. GDPR Consent
↑ Back to top5. Coupon Settings
↑ Back to top6. Setting for sending Emails & SMS using Action Scheduler
↑ Back to top7. Rules to exclude capturing abandoned carts
↑ Back to top8. Settings for abandoned cart recovery emails
↑ Back to top9. Unsubscribe Emails Settings
↑ Back to topHave a look at how these settings can help you:
1. Email Settings


Enable abandoned cart emails
↑ Back to topThis setting allows you to send abandoned cart emails to customers who have not completed their transactions.
Reminder emails will not be sent when any cart gets abandoned by logged-in users and guest users if this setting is disabled.
Email admin On Order Recovery
↑ Back to topThis is a very important setting as the admin will be able to keep track of how many abandoned orders have been recovered.
This notification will be received by the admin automatically once the incomplete sale is completed. Hence for the admin to receive the email for order recovery, this setting has to be enabled.
Email Admin on Cart Abandonment
↑ Back to topThis setting allows you to enable notifications for cart abandonment events. When activated, the system will automatically send email alerts to the specified administrator(s) whenever a customer leaves items in their cart without completing the purchase. This feature can help you identify and analyze cart abandonment trends, enabling you to take timely actions to recover lost sales.
Email Address to Send Abandonment Notifications
↑ Back to topOnce you enable the above setting, you will see an additional field where you can input the email address(es) to which abandonment notifications will be sent. This should be the email address of the administrator or any designated personnel responsible for monitoring cart activity. You can enter one or multiple email addresses separated by commas
Select Cart Sources to Send Abandonment Notifications For
↑ Back to topThis option allows you to customize the types of cart sources for which you want to receive abandonment notifications. Depending on your e-commerce setup, you may have different sources from which customers can add items to their cart (e.g., web, mobile app, or third-party platforms).
Send reminder emails for newly abandoned carts after X days of order placement
This setting allows store owners to set the number of days after which a reminder email will be sent for a newly abandoned cart since the last order was placed by the same user.
For e.g., If user A has purchased the product on the date 10th August 2020. The same user has abandoned another cart after placing an order with the same email address.
If you want to avoid such customers being sent a reminder email suppose for the next 5 days then you can set 5 here. Then another cart will be tracked after 10 days and then, the reminder email will be sent as per the set time.
Capture email address from custom fields
↑ Back to topThe email address field is present in different forms and the newsletter popups on the website. These fields appear at the very first stage when the user accesses the website. It is possible that the visitors enter an email in that custom field and then, abandon a cart without entering an email again anywhere else.
So in this case, shop owners may want to capture the email address of the visitors if they enter it in the custom field and send them a reminder email for their abandoned shopping cart.
Thus, using this feature, email addresses can be captured from the custom email field. You also have the option to enter the class names of the form fields from where an email address can be captured. So, if the user enters an email into that field and abandons a cart then the email address will be captured and a reminder email will be sent.
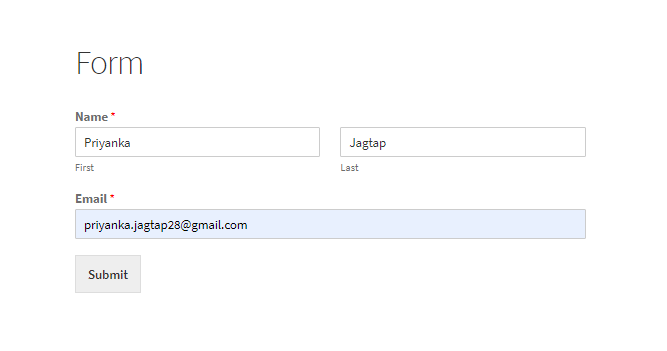
You will simply have to enable the setting first. For instance, You are using the WPForms plugin on your website and have created a form asking for the visitor’s name and email.
You need to add the CSS class to that input field. You can right-click on the field you want to inspect and find the class attached to that input element. In this case, we have added a class wpforms-field-email>input under the option Class names of the form fields.

Let’s say that a guest user visits your site and enters the name and email in the form and then added a product to the cart. Additionally, they visited the checkout page but didn’t enter the email again. The email entered in the form field is automatically transferred to the checkout page.


Email addresses will also be captured if the customer first adds items to their shopping cart and then, fills in the email address in the custom field.
Please note that just the email address will be captured in the plugin only if the shopping cart is abandoned. You can use this feature with the Ninja Forms, Gravity Forms, Contact Form7, WPForms plugin, and any other plugin/theme which provides the custom email field.
Class Names Of The Form Fields
↑ Back to topThe use of class names of the form fields will be done as shown above.
Below is the ready list of classes of some popular plugins we have gathered so you can start using them directly:
Gravity Forms: ginput_container_email>input
Contact Form 7: wpcf7-email
Contact Form by WPForms: wpform_email>input
Ninja Forms: wcap_ninja_email
MailChimp Form: mc-field-group > .email
Capture Email address from URL
↑ Back to topThis feature helps store owners to capture visitors that visit the site without having them add an email address while shopping. First, the key needs to be added in the field by the admin under the Settings tab. When the visitor visits the site and their URL contains the same key as added by the admin, then the value assigned to that key will be added as an email address of the customer
For instance: If an admin is promoting some products via email newsletter then he can add the key as the user’s email address in the URL itself. So once the user opens the email and clicks the product to add it to the cart, his email address will be captured.
To ensure that this setting works, setup needs to be done at two places, your email marketing tool and the Abandoned Cart Pro plugin in WordPress.
1. Setup in the email marketing tool:
Let’s say that you’re using an email marketing tool to send out different promotional emails to customers. Your email marketing allows you to use different merge tags/variables. One of these is [email address]
If you are planning to run a promotional offer for Christmas, you would be including Add to Cart links for your products in these emails. When you send this email out through your email marketing tool, your Add to Cart link in the email would be something like https://www.tychesoftwares.com/?add-to-cart=25&quantity=1&email=[email-address]
Here, 25 is the ID of the product which will be auto-added to the cart when the user clicks on the link in the email. [email-address] will be your merge tag/variable from your email marketing tool.
When your email marketing tool sends out this email, it will replace [email-address] with the email address to which the email is being sent.
So suppose the email is sent to [email protected], then the actual link in the email would be
https://www.tychesoftwares.com/?add-to-cart=25&quantity=1&[email protected]
2. Setup in the plugin
Remember the key mentioned earlier? Now’s the time when you will have to set up this keyword that was used in your email marketing tool.
To do this, go to Capture Email address from URL.
Since we used the word ’email’ in the link, we will enter the same in the plugin settings. This will ensure that when your site URL has the same key then the email address will be captured.

Note: The text which we add in the Capture Email address from URL field is considered as the key.
Here, we’ve taken the example of the keyword ’email’ but you can replace it with any word of your choice. Some of the options that you can consider are: ‘user’, ‘address’, or any random word. If you are using ‘user’, the link in the email would be https://www.tycehsoftwares.com/?add-to-cart=25&quantity=1&user=[email-address] & the keyword ‘user’ will be saved in the plugin settings.
Once the emails are sent out and when the user clicks on the link in the email, the product will be auto-added to the cart. At the same time, the email address will be captured by the plugin.
Also Note: When a guest user visits the site and their email address is captured from the URL, then the Add to cart popup modal will not be shown to that user as their email address has already been captured.
Enable Email Verification
↑ Back to topThis setting allows the admin to verify whether an email address is valid or invalid as soon as the user enters the email address in the Add To Cart popup email. Verification is done via Debounce email verification service.
It will allow the emails entered in Add to Cart Popup modal to be validated in runtime (the time they have been entered).
This allows store owners to avoid fake emails being entered along with minor errors by customers such as .con instead of .com
Enter DeBounce API Key
↑ Back to topIf you want to enable the service, enable the checkbox and add the API Key from Debounce. If you don’t have an account with Debounce, you can register from here.
After registering, the key can be found in your account below:

Add a name to the API and click on Submit. Your API key is now available like below:

Copy the key and paste it into our plugin settings and save the settings.
After setting the key it is important to set the domain on which the key will be used. For this, click on the “Set CORS Domain” button. A popup will appear. Set the domains on which the service will be used like below and click Submit.

2. Cart Settings
↑ Back to top
Cart abandoned cut-off time for logged-in users
↑ Back to topThis is the cut-off time set for logged-in users, after which the cart will get abandoned if the order is not placed.
So, if the X minutes are mentioned and changes saved, the carts will be captured for logged-in users after X minutes on cart abandonment.
Cart abandoned cut-off time for guest users
↑ Back to topThis is the cut-off time set for guest users, after which the cart will get abandoned if the order is not placed.
Similar to the cut-off time for logged-in users, the carts of guest users will be captured on X minutes which is mentioned after cart abandonment.
Do not track carts of guest users
↑ Back to topIf you do not want to capture guest carts and visitor carts once these are abandoned, then this setting should be enabled.
As per the requirements, you can even disable the setting if you wish to track the abandoned carts of guest users as well as visitors.
Start tracking from Cart Page
↑ Back to topWhen a customer enters no personal details after adding items to the cart then that customer is considered as a Visitor.
Such customers like to hide their details while making a purchase. Hence when the abandoned cart gets captured for this user, there are no details of them.
Therefore if this setting is enabled, the cart gets captured from the cart page as soon as he adds any product to the cart.
Do not track carts of logged-in users
↑ Back to topThis setting provides a provision for not tracking abandoned carts for logged-in users.
It is useful in cases where you may think you do not want to know how many logged-in customers have abandoned their carts and instead want to know how many guest users and visitors have abandoned them so as to focus on them for recovery of sales.
Simply enable the setting in such a case.
Add product to cart when close icon is clicked in the popup modal?
↑ Back to topWhen this option is enabled, the product will be directly added to the cart when the customer clicks on the close icon on the Add to Cart Popup Modal.

3. Settings
↑ Back to topAutomatically Delete Abandoned Orders after X days
↑ Back to topThis is the number of days assigned after which the abandoned orders will be deleted automatically.
This typically happens when the lost customer does not respond to the reminder emails for X days and hence the order sits in the cart for that long and finally gets deleted as per the settings.
Remove Data on Uninstall?
↑ Back to topEnabling this setting before uninstalling the plugin will completely remove Abandoned Cart data when the plugin is deleted.
Reset usage tracking
When you click this button, the site data that is sent to Tyche Softwares for plugin improvements will be stopped because usage tracking will no longer continue.
The store owner/manager will then again be asked if they want us to track their data for performance improvements.
4. GDPR Consent
↑ Back to topWhen managing customer data, it’s essential to adhere to GDPR (General Data Protection Regulation) guidelines, especially when sending promotional messages, such as reminder email notifications, and SMS notifications about abandoned carts. Enable these settings to ensure your compliance.

Enable GDPR Notice
↑ Back to topEnabling this setting will display a message on the Checkout Page and Email Address capture Popup to inform Guest Users about how their data will be collected in compliance with the GDPR rules.
Message to be displayed for Guest users when tracking their carts
↑ Back to topThis refers to the message that will appear on the Checkout page and Email Address Capture pop-up for Guest Users.
In compliance with GDPR, the message needs to be displayed for the Guest user to inform them about how the admin will use their email address or other personal details entered.
For instance, a message can be: Your email address will help us to enhance your shopping experience and will not be misused. For further details, kindly check our Privacy Policy.
Message to be displayed for registered users when tracking their carts
↑ Back to topThe message entered here will be displayed for Registered users and appear on the Shop & Product pages.
In compliance with GDPR, the admin needs to add this message on these pages to inform Registered users of how their data will be used.
For instance, the message can read: Your personal details are safe with us. Please check our Privacy Policy to learn how we will use your data.
GDPR Compliance Type
↑ Back to topOpt-Out of Cart Tracking:
You can choose this option if you want to disable tracking of abandoned carts for your customers. This means that any activity related to a customer’s cart will not be recorded or used for remarketing efforts. This setting ensures that you comply with GDPR regulations by respecting your customers’ right to choose not to be tracked.
Opt-In to Cart Tracking:
Choose this option if you want to actively track abandoned carts for your customers. Enabling this allows you to collect data on customers who add products to their cart but do not complete the purchase. This information can be used for email reminders and marketing purposes. Please ensure that customers are informed about this tracking and give their consent, in line with GDPR requirements.
Allow the visitor to opt out of cart tracking
This option allows both guests & registered users to opt out of cart tracking.
The site admin can add text for GDPR messages in the option “Message to be displayed when the user chooses to opt-out of cart tracking” which will be displayed as links and allows users to opt-out of cart tracking.
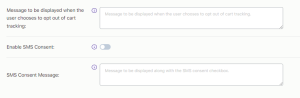
Message to be displayed when the user chooses to opt out of cart tracking
↑ Back to topThis message will be displayed when your user has definitely chosen to opt out of cart tracking.
Enable SMS Consent:
↑ Back to topThis option allows you to request explicit consent from your customers before sending them SMS messages related to their abandoned cart. GDPR requires that you obtain clear consent from individuals before processing their personal data, including phone numbers for marketing purposes. By enabling this setting, you respect your customers’ privacy and build trust with them.
SMS Consent Message:
↑ Back to topThis setting allows you to customize the message that customers will see when asked to provide consent for receiving SMS notifications.
A clear and concise consent message informs customers about what they are agreeing to. This transparency is crucial for GDPR compliance and enhances the customer experience.
5. Coupon Settings
↑ Back to top
Delete Coupons Automatically
↑ Back to topThis will allow the store owners to automatically delete the expired and used coupon codes every 15 days.
Delete Coupons Manually
↑ Back to topIf you don’t want to delete the coupons automatically every 15 days, then you can use this option.
Whenever you want to manually delete the expired and used coupon codes then you can click on the Delete button provided there.
6. Setting for sending Emails & SMS using Action Scheduler
↑ Back to topThe plugin uses the Action Scheduler to send automatic abandoned cart reminders. The Action schedular runs all the scheduled actions at the desired time/frequency and it will be displayed at Tools > Scheduled Actions > Pending.
Even if the WP Cron is disabled, the action scheduler library runs the actions which have been scheduled when an admin page request occurs.

Send Abandoned cart reminders automatically using Action Scheduler
If you enable this option, the abandoned cart reminder emails will be sent automatically as per the set time. If this option is disabled then reminder emails will not be sent automatically using the action schedular and need to be set manually from cPanel.
Run Automated Scheduler after X minutes
↑ Back to topIn this field, you can enter the duration in minutes. The Action scheduler will run automatically after this duration to send abandoned cart reminder emails and SMS to the customers.
For Eg, If you enter 2 minutes, then after every 2 minutes, the schedular will run and send reminder emails and SMS automatically to the customers.
This is the time that has to be set first for automatically sending reminder emails.
7. Rules to exclude capturing abandoned carts
↑ Back to topRestriction Settings are used to stop capturing abandoned carts of specific customers. It can be set according to your requirements.
This will help you avoid SPAM and BOT issues since it is found to be a major issue with online merchants. This provision is given especially to restrict such actions.

Do not capture abandoned carts for these IP addresses
↑ Back to topWith this setting, the carts which the customers abandon with the mentioned IP addresses will not be captured. Thus, no reminder emails will be sent to these customers as their carts won’t be captured.
Enter the IP address, scroll down, and click ‘Save Settings’ once done. Please note that you can enter multiple IP Addresses by separating them with a comma.

This functionality implies that all the carts which are abandoned from the mentioned IP addresses will not be tracked by the plugin. Therefore you need to write all the IP addresses separated by commas whose abandoned carts you do not want this plugin to capture.
You can block the specific IP address by adding the IP address in the setting as shown above in the image. As the above image demonstrates that IP address 28.4.43.122 will not be captured for the abandoned cart.
For instance, if you have noticed that you have spam from certain IP addresses and it is ruining the abandoned statistic of your store, then you can block the full range of the IP addresses.
The plugin update 4.3 version has provided the feature where you can use the wildcard ‘*‘ character for blocking the range/block of the IP address.
The IP range starting from 27.5 is always spam which abandons the carts, so you can use the wildcard character to block the whole range. You just need to add “27.5.*” in the “Do not capture abandoned carts for these IP addresses” setting and save it.
So while capturing the customer’s carts, the plugin will check if the customer’s IP Address starts from 27.5 and if so, it will not be captured and won’t be displayed in the Abandoned Orders tab.
Do not capture abandoned carts for these email addresses
↑ Back to topThis option allows you to stop capturing abandoned carts of customers with the mentioned email addresses. You can use this for specific customers who have never come back by clicking on the checkout link from the reminder emails. After knowing the behavioral pattern of such customers, you can decide to block capturing their abandoned carts for sending reminder emails.
For instance, if you enter the address ‘[email protected]’ then any carts abandoned by this user will not be captured.
To implement this, enter the email addresses by separating them with a comma, scroll down, and click ‘Save Settings’.
Do not capture abandoned carts for email addresses from these domains
↑ Back to topThis option lets you avoid capturing abandoned carts in bulk from the domains specified by you.
For example, if you enter the domain name ‘hotmail.com’ or ‘yahoo.co.in’ etc in the field, then all the abandoned carts of customers whose email addresses have these domain names will not be captured.
Do not capture carts from countries
↑ Back to topThis option allows you to restrict capturing carts from specific countries.
For instance, if you select the country ‘India’ or ‘Sri Lanka’ from the dropdown in this field, then the abandoned carts from these places will not be captured.
8. Settings for abandoned cart recovery emails
↑ Back to top
“From” Name
↑ Back to topThe name that is entered in this field will appear in the email sent to the customer. Eg. Admin: when an admin sends an email to the customer.
“From” Address
↑ Back to topThe email address entered here is the one from which reminder emails are sent out. Please note that this setting is applicable when the PHP mail function is used by a Hosting Provider. It will not be used if SMTP mail plugins are used.
If the mail configuration is based on SMTP, then this setting will not be functional.
Send Reply Emails to
↑ Back to topThe reply to the email will get sent to the email addresses entered here. Eg. let’s say that the Admin’s email address is entered in this field. When the customer clicks on Reply upon receiving the email, the reply will be sent to Admin’s email address.
Product Image( H x W )
↑ Back to topYou can set the dimension of the product image which appears in the abandoned cart reminder emails. For instance, you can have 25 x 25 as your dimensions.
Product Name Redirects to
↑ Back to topThis option will allow the site admin to choose the page where the product link in reminder emails should redirect to.
If you select the Product page here then clicking on the product link in the reminder email will redirect to the product page.
If you select the Checkout page here then it will redirect you to the checkout page with the abandoned items.
UTM parameters to be added to all the links in reminder emails
↑ Back to topIf you wish to add some UTM parameters for all the links that are provided in the reminder emails, the can be done here.
Auto login WordPress users coming to the site using reminder email links
↑ Back to topEnabling this setting will ensure that the customers returning to your site through the links in the reminder emails will be automatically logged in to the site.
9. Unsubscribe Emails Settings
↑ Back to top
Unsubscribe Landing Page
↑ Back to topAs seen above, the plugin now allows the site admin to choose from 3 options. Each of these is described below:
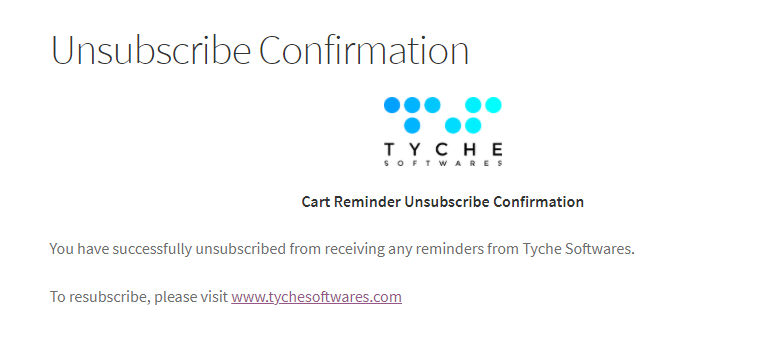
a) Default Unsubscribe Page
↑ Back to topThe plugin now generates a default unsubscribe landing page. This page displays the site icon along with the site name and some default text informing the user that they have now been unsubscribed and will no longer receive any reminders for their abandoned cart.

b) Custom Text
↑ Back to topYou can now set up any custom text you wish to display on the subscribe landing page. The default text will be:

You can change the text to something like this:

The page will continue to show the site icon and name at the top and display the custom text below the same.

c) Custom WordPress page
↑ Back to topThe third option is to redirect the user to a custom WordPress page. You can select any WordPress page by typing in a few characters to start the search.

The customer will be redirected to the page when he/she clicks on the Unsubscribe link.
Allow customers to unsubscribe from all future Abandoned Cart Reminders
↑ Back to topIn the latest version 9.11.0 of the Abandoned Cart Pro plugin, we have included the “Global Unsubscribe” feature that enhances the user experience by empowering customers with more control over their email preferences. With this new functionality, customers can now choose whether to unsubscribe from all future Abandoned Cart reminders in addition to the existing option to unsubscribe from the cart-specific reminders.
We provide an option named “Allow customers to unsubscribe from all future Abandoned Cart Reminders” which will give an option to the customers whether they want to unsubscribe from the current abandoned cart reminders or from all future abandoned cart reminders also when they click on the unsubscribe link in the email.

When a customer receives an abandoned cart reminder email, they will notice an Unsubscribe link included within the email content. By clicking this link, customers will be presented with two options:
- Unsubscribe from the current abandoned cart: Selecting this option will remove them from receiving emails specifically related to the current abandoned cart only. They will continue to receive future reminders for any other abandoned carts they may have.
- Unsubscribe from this and all future abandoned carts: By selecting this option, customers can opt out of all future reminders regarding abandoned carts altogether. This means they will no longer receive any automated emails related to their abandoned carts, ensuring they have full control over their email preferences.


In case you wish to see any more options or settings to choose from, please free to send us an update.
Pop Up Templates
↑ Back to topPopup Templates have been introduced in our Abandoned Cart Pro for WooCommerce plugin to help you curb cart abandonment. It’s a great way to capture email addresses before your customer even reaches the Checkout Page or when the customer tries to leave your site. Let’s see how it works.
1. Popup Templates Page
2. Add to Cart Popup
3. Exit Intent Popup
4. Popup Statistics
1. POPUP TEMPLATES PAGE
In order to configure Popups for your WooCommerce store go to WooCommerce > Abandoned Carts > Settings > Popup Templates.
This page will display all the different popup templates that have been created by you. Here’s how the default one will appear:

You will find two default templates here- Add to Cart and Exit Intent as shown above.
The various details that would be included are the Name of the Template, Rules, Email Captured, Viewed, No thanks, whether the template is enabled or disabled.
Along with this, stats related to the times email addresses were captured, popup templates were viewed by the visitor, and the number of times the ‘No Thanks’ option was selected is also displayed here. These stats give the site admin all the necessary information to make correct decisions on what works and what doesn’t.
By default, each new template created would be Disabled. You can simply choose to enable it. If the toggle button is green, it means the template has been enabled as shown in the above image.
When you hover over the name of the templates, the following settings will be available:

The Edit option allows you to edit the template.

The Duplicate option allows you to create a duplicate of the selected template.
The Delete option allows you to delete the template.
Lastly, the View option will let you see the details of this template like this:

You will also find the feature of Bulk Actions incorporated under the Popup Templates page. Located directly below ‘Add New template’, this feature will allow you to delete the different templates created in Bulk.
You can select the templates that you wish to delete, then choose the Delete Action and finally click on ‘Apply it’. The selected templates would be deleted altogether.

Now, in order to add a new template, you can click on the Add New Template option.

We will look at our two popup templates in the articles below.
2. ADD TO CART POPUPS
↑ Back to topAdd to cart popup modal is displayed to non-logged-in users. For logged-in users, the email is already captured once they are logged in and therefore the pop-up won’t be displayed.
Let’s look at the detailed working of how the guest user’s email address is captured with the Add to Cart modal popup.
We will look into the 3 sections for a better understanding of the popup modal.
1. Add to Cart Popup Settings
2. Frontend Popup Display
1. Add to Cart Popup Settings
↑ Back to topAfter choosing to add a new template, you will configure the following settings:


Here, you can make changes according to your business requirements. Let’s take a look at each setting.
a) Edit/Add Popup Templates
↑ Back to topTemplate Name: Here you can give a unique name to every new popup template that you create. For instance, ATC for Clothing.
Template Type: Here you will select whether it will be an Add to Cart Popup Template or an Exit Intent Template. You will go with Add to Cart.

b) Rules
↑ Back to topRules: This setting lets you create specific rules for the templates. To add rules, you can click on ‘Add Rules’ which will open the following settings-
- Rule Type: The Rule Type dropdown comes with three options- Pages, Product Categories, and Products. Herein, you can choose the rules to be created for any of these three options.
- Conditions: The Conditions dropdown comes with two options- ‘Includes any of’ and ‘Excludes any of’. With these two options, you can set the condition of including or excluding any of the Values from your Rule Type.
- Values: This lets you choose the products, pages, or categories to whom you wish to apply the rules. For example, if you select Rule Type as Pages, then under Values you can choose any of the pages from your website to which the rules would apply. You can choose as many values as you like here. If you choose the Rule Type as Products, then the values would be the different products on your site. Similarly, selecting Rule Type as Product Categories would have various product categories on your store as the values.
- Actions: You can choose to easily edit or delete the existing rules created. Just below it, you will also find the option to add a new rule.
Eg: For example, you can restrict the Add to Cart Popup to Rule Type ‘Product Categories’, where Conditions will be ‘Includes any of’, and Values would be Clothing, Accessories, Hoodies, and Tshirts.
Match Rules: Under the Match Rules dropdown, you will find the following two options – ‘Match all rules’ and ‘Match any rules’.
If you choose ‘Match all rules’, then the popup will show only when each and every rule is matched.
If you select ‘Match any rules’ then you have decided to display the popup when even a single rule is matched.

If no rules are present then the Add to Cart popup will be displayed on all the pages.
c) Coupon Settings
↑ Back to topThe plugin has also added coupon settings to start applying discounts in response to the email address entered by the customer. Enabling the setting ‘Offer coupons on email address capture’ will allow store owners to offer the discount when the customer enters an email address into Add to cart popup.
The discount will auto-apply when the user enters an email address in the ATC popup.
Under Type of Coupon to apply, you can choose whether you wish to apply an Existing Coupon or Generate a Unique Coupon code from the dropdown.
If you choose Existing Coupons then you will get an option called Coupon code to apply. Here you enter your coupons.
By default, the ‘Existing Coupons’ type is selected in the ATC, and for that, you need to select the coupon code created under WooCommerce > Marketing > Coupons.
For instance, you can select the Abandoned20 coupon code as shown here:


In a similar manner, if you select ‘Generate Unique Coupon Code’ then you will get to choose your Discount Type. In the dropdown, you can choose either Percentage discount or Fixed Cart Amount. We will go with the Percentage discount and enter our discount percentage as 20%. If you want, you can use the Allow Free Shipping option by ticking its checkbox.


Next, irrespective of the type of coupon that you have selected you will get to view the following settings:
Coupon validity (in minutes): Here, you will enter for how long your coupon will be valid for. For example, let’s enter 5 mintues.
Urgency message to boost your conversions: In this text you can use merge tags such <coupon_code> or <hh:mm:ss> to create the effect of urgency.
Message to display after coupon validity is reached: this text will be displayed once your customer has surpassed their coupon validity time.
Display Urgency message on Cart page (If disabled it will display only on Checkout page): You can enable this setting if you wish to display the urgency message on your Cart Page as well.
For instance, enabling this setting will display a message on the cart page like “Coupon <coupon_code> expires in <hh:mm:ss>. Avail it now.” which can motivate your customers to complete the purchase.
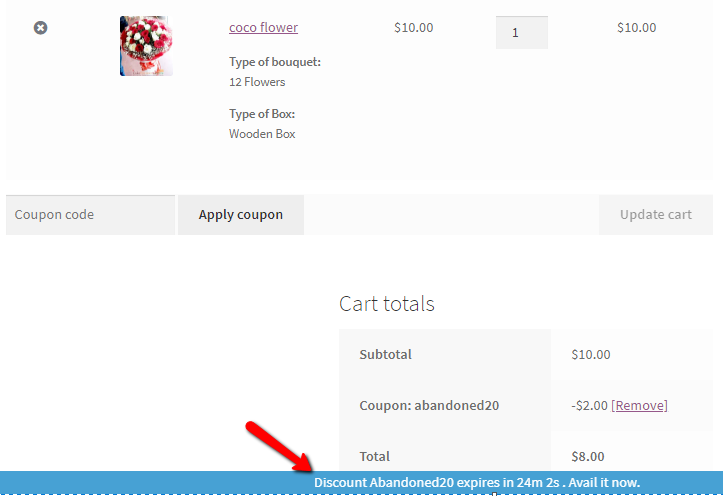
Here’s how the coupon code will be applied on the front for the visitor:

d) Configure Popup
Modal Heading: It will allow you to change the popup heading and color of the heading text.
Modal Text: It will allow you to change the text and color of the description that appears just under the heading.
Email placeholder: You can change placeholder text for the email address field which will show in the popup modal.
Add to cart button text: This allows you to change the text of the popup modal button which will add the product to the cart. Along with this setting, you can change the button background color as well as the text color.
Email address is mandatory?: Using this setting, you can decide whether your customer should always provide the email address or not. If the toggle button is green then it is mandatory for the guest customer to provide the email address. This will hide the non-mandatory text.

If the toggle button is disabled then it will allow you to set the text for not providing the email address.
The setting named Not mandatory text will allow you to change the text. When the email address is non-mandatory, then clicking on the No Thanks button will allow the end-user to add the product to the cart without the email address.

Capture Phone: This will allow the site admin to capture the guest user’s phone number in the Add to cart popup without waiting for them to enter the phone number on the checkout page.
This field is optional. By default, only the email address will be captured via the Add to cart popup.

Also, there is a field “Phone placeholder” present in this template where you can add a placeholder like “Please enter your phone number in E.164 format” for users to understand in which format they need to enter the phone number in the popup.

Here’s how it will appear on the frontend:
Live popup preview
↑ Back to topYou can observe the live changes in the text and the selected color in the right-side preview of the modal.
As you change the settings on the left side fields, it will show the live preview on the right side.
Video Player
00:15
00:20
Once you’re done with all the changes, you can save the settings by clicking the Save Changes button.

Also, if you want to reset to the default configuration of the popup modal settings then you can click on the Reset to default configuration button. It will erase all settings of the popup modal and set all the field data with the default values.
2. Frontend Popup Display
↑ Back to topThis popup modal will be displayed on the shop page or product page when your customer clicks on the Add to cart button. You can check below how the Add to cart popup modal will be represented on your website for the guest users.
Add to cart popup modal on Shop page when email address capture is not mandatory:

Add to cart popup modal on Shop page when email address capture is mandatory:

Add to cart popup modal on the Product page when email address capture is not mandatory:

Add to cart popup modal on the Product page when email address capture is mandatory:

When Guest User clicks on the Add to cart button, it will immediately open the above popup to ask for the email address. It will help you to capture the guest user’s email address immediately instead of on the Checkout page.
If you have enabled the ‘Add Product to Cart when Close Icon is clicked’ then on the frontend when customers click on the close icon, the product will immediately be added to their cart.
You can enable this option by going to WooCommerce > Abandoned Carts > Settings > General > Cart Settings and scrolling down till you find ‘Add Product to Cart when Close Icon is clicked’ option. Here’s how it will appear-

On the Frontend, this setting will appear as such-

Once the customer provides their email address in the popup modal, then that email address will be directly populated into the checkout page Email address field.

The plugin does not use cookies for storing the customer’s email address, instead, it uses the local storage of the browsers.
Once the customer has added the product to the cart (with or without the email address), the next popup will be displayed after 24 hours after which the first popup has been shown.
3. EXIT INTENT POPUP
↑ Back to topAnother way to curb your cart abandonment is by using the Exit Intent Popups.
1. Exit Intent Popup Settings
2. Frontend Display
1. Exit Intent Popup Settings
↑ Back to topThe default Exit Intent Popup Page will appear just like the Add to Cart Popup Page except for a few different things:


a) Edit/ Add Popup Templates
Template Name: Here, you will enter whatever name you would like to enter for your Exit Intent Template. For example, you can go with Clothing Category Exit Intent Popup as our name.
Template Type: Here, you will choose the Exit Intent dropdown option.

Please note that by default you will find one Exit Intent Popup Template created for you. It will be named ‘Exit Intent for all pages’ and it will be deactivated. If you wish, you can customize this template.
b) Rules
c) Coupon Settings
d) Configure popup for guest users
This setting will help you motivate the user to go to the checkout page via the popup. An important thing to note here is that this exit intent popup would appear for guest users by default where their email address has not been captured.
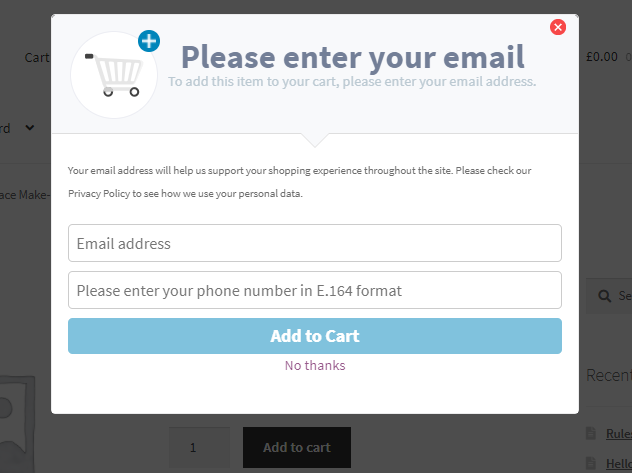
Modal Heading: This would be the very first text that would appear on your exit intent popup. For example, here we will keep the text as the same text which has been entered by default, which is ‘Please enter your email.’
Modal Text: This would be the subheading or the part where you would provide extra information. For example, by default, the text says ‘To add this item to your cart, please enter your email address.’
Email placeholder: This is the place where your guests will enter their email address
Link Text: Under the link text you can have the text ‘Complete my order!’. This button will direct your visitors to the Checkout page.
Email address is mandatory?: If you enable this setting, then your visitor will have no choice but to enter their email address. If you wish to give them an option, then you will have to disable this setting. This would mean that the visitor will get a ‘No Thanks’ option. When they click on the No Thanks option, they will be directed to the Checkout page without their email address being captured.
Here, we also have the option to customize the color of our Modal Heading, Modal Text, and Link Text. Once you have customized your exit intent popup for guest users to talk about the discount, this is how it will look:

e) Configure popup for logged-in users
This Exit Intent Popup can also be used for your logged-in users who will be forced to go to the checkout page.
By default, this popup would appear for logged-in users. However, if you wish to make this exit intent popup appear for Guest users without email addresses, then you can enable the Allow all users (including guest users) to checkout without capturing the email setting.

As discussed previously, you can enter your Modal Heading, Modal text, and Link text and choose colors for them.
One new setting that you will find here is the Link to redirect to option. Here, you will have to enter the URL of the page where your popup will redirect the customer.
Usually, it would be the URL of the Checkout Page. If you leave it blank, then by default, the user will be taken to the Checkout page.
Here’s how the exit Intent pop for logged-in users will appear after we have set your custom settings:

2. Frontend Display
Let’s say a guest user has browsed your store and added an item, for example, a designer scarf. Here’s how the Exit Intent popup will appear for your guest users when they are trying to exit:

Here’s how it will look like when the visitor has entered their email address and has been redirected to the Checkout Page:

As you can see in the above image, the visitor will see the discount directly applied to their order and they will also view the banner which will display the time remaining until which they can use their coupon. Since we had offered a 5% discount for 5 minutes, the banner will start its countdown from 5 mins on.
Now, let’s say that you offer a 5% discount to your logged-in customer after adding a product to their cart. Then, the exit intent popup will appear as such:

After your customer clicks on Complete my order! they will be redirected to the checkout page which will look like this:

4. POPUP STATISTICS
↑ Back to topAfter you are all set with the popup, how would you determine whether it is worth using or not? Some handy statistics will help you out.
You can check the statistics of the Add to Cart and Exit Intent popups by going to WooCommerce > Abandoned Carts > Dashboard > Email Capture Popup Displayed as shown below:

It will allow you to take a quick glance by looking at the Add to Cart popups and Exit Intent popups count. This is the same as the number of popup impressions. Technically we don’t wish to call it that because if a user happened to close the browser as soon as the popup appeared, then it is not incremented here.
The Email Capture Popup Displayed will tell you the number of popups displayed to the customers. In the above case, it is 62.
Just below it, you will find the number of email addresses captured using Add to Cart Popups. It is 24 in this case.
Lastly, you will also see the number of email addresses captured from Exit Intent Popups. In the above case, it is 1.
To conclude, use this feature to its maximum potential to attract back customers that will eventually lead to conversions.
Facebook Messenger
↑ Back to topThe Abandoned Cart Pro for WooCommerce plugin gives you the option to send reminder notifications on Facebook Messenger. Here’s how to go about it:
1. Pre-requisites
↑ Back to topa) Facebook Page
If you do not have a Facebook page for your business then you will need to create one.
A Facebook page can be created by following the steps given in the following link or you can directly click here to create a Facebook Page.
For example, here, we have created a page called Tyche Softwares Page.

Creating a Facebook Page
b) Facebook App
↑ Back to topIf a Facebook App is already present, then you need to enable valid permissions for Messenger integration.
If no App is available, follow the steps below for more information:
2. Configuration Steps
↑ Back to topThe Facebook Messenger Settings tab can be found at WooCommerce > Abandoned Carts > Settings > Facebook Messenger.
Here’s how the default page appears:


Facebook Messenger settings in the Abandoned Cart Pro plugin
Let’s look at all of these settings individually.
1. Enable Facebook Messenger Reminders
Use this setting to enable Facebook Messenger reminders. A checkbox will appear on the product page asking for consent to allow Order information to be sent on Facebook Messenger.
2. Facebook Messenger on Add to Cart Pop-up Modal
If you have a pop-up modal template set up then the add to cart pop-up modal will display a checkbox that will allow customers to connect their Facebook.
3. Icon Size of User
Using this setting you can set the size of the icon that will appear on the product page indicating the user has already logged in.

Icon size of the user on the frontend
4. Consent Text
A text asking for the consent of the visitor will appear before the checkbox indicating what information shall be sent on Messenger.
5. Facebook Page ID
Enter your Facebook Page ID. Page ID can be obtained from About section > Page Transparency > Page ID as shown below:

Page ID on the About Facebook Page
6. Messenger App ID
An App ID needs to be provided here. If you do not have an App ID follow the steps below to create one App. Please note that for creating an App, a Facebook Page is mandatory.
To create an App, log in with your Facebook details at https://developers.facebook.com.
Click on the Get Started link and create a new App by following the wizard.
Note: If you are seeing My Apps link instead of Get Started, then you already have one app created for some other purpose. Click on My Apps link and create a new App as shown here:

After clicking on the Get Started link, you will have to register yourself like this:


The registration process for creating an app
After completing the Registration process, you shall be taken to a screen something similar to the below screenshot:

Create App option
Once you click on Create App, you will have to select App Type, App Name (best advised to put in a name related to your business), and Contact Email as shown in the below images:


Once done, you can click on Create App & you will then be redirected to your App Page as shown below:

As shown above, we now see the name of our Facebook page in the left top corner called ‘Messenger’.
Just beside it, you will find the App ID needed for our Settings to set up Facebook Messenger. Amongst all the products, find the Messenger one & click on Set Up under it, as shown above, to add Messenger to your App.
Once you click on Set Up, you will be redirected to the Settings page of Messenger.
7. Facebook Page Token
Here we will have to enter our Facebook Page’s Token. For this, we will go to the Settings page of the Messenger product. Navigate to the Token Generation section and select the Page as shown below to generate the Facebook Page Token for our Settings.

We will click on Add or Remove Pages to add our Facebook Page. Once you click on it, you will get a popup asking you to fill in various settings for the same. Here’s how they will appear:

Facebook user authentication process

Once you are done, you will get to view this message:

As our Page has now been added, we will get to view it under Access Tokens as shown below:

Generate Token settings
We can now click on Generate Token to create our Token which can be viewed in the Tokens section. You can copy this and paste it into the Facebook Page Token field of our plugin.
8. Verify Token
You can enter any text you wish for the Verify Token. An example will be random text would be thisisverifytoken.
Once you have configured these settings, here’s how they will appear:


Facebook Messenger settings after filling in the details
You can click on Save Changes once you are done. If scroll down you will get to see the following 2 sections:

1) Domains Whitelisted for the page
If you wish to view or add domains that are Whitelisted for your page, you can go to your Page and follow the path: Professional dashboard > Page access > New Pages experience >Advanced messaging > White-listed domains.
Here, you can enter your domain (the URL of your Facebook page) & Save it successfully. It would appear as such:


Adding your Facebook Page as a white-listed domain
2) Setting up Webhooks
To set up your webhooks, you can copy the webhook callback URL shown in the below image:

Webhook callback URL
Now, we go back to the Webhooks section under Token Generation section of our Facebook App & click on Setup Webhooks. Enter the Webhook URL along with the verify token here and remember to select all the options. Click on Verify and Save as shown below:

Once this is done, you can add subscriptions to your Facebook Page by clicking on Add Subscriptions option as shown below:

Add Subscriptions option
You can now add all the subscription fields as shown below:

Subscription fields
Once they have been added, you will be able to view them as such:

Webhooks once they have been added
Once the webhooks are set up, the final step is to submit the App for review and permissions.
Before proceeding to submit the App make sure to fill in the details under Basic Settings of the App such as App category, an image for the App, Privacy policy URL, and the Terms of Service URL.

Basic settings page
If you have not configured these settings out here, then you will have to configure them while you send your app for review. Let’s see how to send your app for review. We will first click on App Review as shown below:

Request Permissions or Features option
We will click on Request Permissions or Features option and proceed by finding pages_messaging & then click on Request Advanced Access through App Review as shown here:

pages_messaging permissions
Once you’re are done, you can now proceed by clicking on Edit App Review Request option:

From there, you will be taken to the submission page where you will review them. Here’s how it will appear:

Request for App Review Page
If you scroll down, you will find that you will have to fill in the details for three different sections. The first section is Complete App Verification:

Complete App Verification section
You can provide all the verification details as shown below:

You can click on Save after filling in your details.
The second section is Requested Permissions and Features section as shown below:

Requested Permissions and Features section
Over here they will ask you to enter the following details:


The last one is the Complete App Settings section as shown below:

Complete App Settings section
As we had said earlier if you haven’t filled in the necessary details under Basic Settings of the App such as App category, an image for the App, Privacy policy URL, and the Terms of Service URL, then you will have to fill them up in this section. Here’s how they will appear:


After clicking on Save and filling in all the details for the three sections you can scroll down to the ‘Submit for Review’ button as shown below:

Submit for Review option
Your app will thus be submitted for review!
Note: Once the above approvals are done, Facebook requires you to do Business verification and you will need to submit your utility bills or Business Proof for approval. You will receive notifications as to where to upload the needed documents.
SMS
↑ Back to topWith the Abandoned Cart Pro for WooCommerce plugin, sending SMS reminder notifications using an SMS platform will help you stop cart abandonment and losing precious customers.
A. SMS Reminders
The first thing you need to do is first create a Twilio account. If you already have an account, you can log in and note the details:

Make a note of your Twilio account details and phone number. They will be available in your Dashboard:

Now, go to your site’s WooCommerce > Abandoned Carts > Settings > SMS tab as shown below:

Enabling the SMS reminders for abandoned carts
Enable the send SMS toggle. Next, fill in the details from your Twilio account such as your Twilio phone number in the From field, Account SID, and Auth Token.
Click the Save Changes button.
B. SENDING TEST SMS
↑ Back to topScroll down to the Send Test SMS dropdown and enter the number of the recipient and your message:

Add details for Send Test SMS
Make sure to enter a valid phone number in the Recipient field. Click the Send button.
Your Test SMS is ready to be sent.
C. Adding or Editing SMS templates
↑ Back to topYou can add or edit SMS templates from the SMS Notifications tab under the Templates tab as shown below:

SMS notifications option under the Templates tab
The entire process has been documented here.
D. An Instance of SMS Reminder
↑ Back to topLet’s say that you have used a SMS new template where the SMS reminder is sent after 1 minute of cart abandonment. The reminder will be sent to the customer’s phone number which is entered in the billing details section on the Checkout page for Guest users.
Otherwise, this reminder will be sent to registered users’ phone numbers.
Now let us abandon the below cart:

Item added to the cart
When they go to the Checkout Page, under the Phone field, they will get to see the consent checkbox as shown here:

SMS Consent settings on the Checkout Page
Once they tick it, a reminder SMS with the following text will be sent to the customer’s phone number after 1 minute of cart abandonment:
”Dear {{user.name}}, you tried purchasing online on {{date.abandoned}}. We would like to provide you a discount of 20% to complete the transaction at {{shop.link}} using code {{coupon.code}}. Thank you!”
The message will be displayed on the phone as shown below:

SMS message sent to the customer
In conclusion, it’s now time for you to start sending reminders through SMS using our Abandoned Cart Pro for WooCommerce plugin.
Email Report
↑ Back to topTracking abandoned cart metrics over time is key for site admins. Viewing weekly or monthly reports shows if abandoned carts are trending up or down. This data guides you on what actions to take next.
The Abandoned Cart Pro for WooCommerce plugin makes it easy to stay on top of these metrics. The plugin will automatically email you abandoned cart reports on a weekly or monthly schedule.
To set up these email reports:
- Go to WooCommerce > Abandoned Carts
- Click on the Settings tab
- Select Email Report

On the Email Report tab, you can now choose to send email reports on the following basis:
1. Weekly Email Reports
2. Monthly Email Reports
1. Weekly Email Reports
↑ Back to topSelect ‘Weekly’ if you want to get email reports on a Weekly basis. Provide the email address where you want to receive the reports and then click ‘Save Changes‘.
You can add multiple email addresses, each on a new line like this below:

Since this report was chosen to be sent Weekly, here’s how the email report will appear with the details:


In the weekly email, you will find details such as the dates of the week, the number of carts abandoned, the number of carts recovered, sales figures, and campaign engagement. The admins will receive it on the first day of the week.
2. Monthly Email Reports
You can also choose to send these reports monthly. Simply select the Monthly option, enter the email address, and click ‘Save changes’.

After the month ends, your report will be sent. Here is how the monthly report will look with all its details:


If you choose the monthly report option, the admins will receive the abandoned cart report on the 1st day of each new month.
In Summary
↑ Back to topThese automated weekly or monthly consolidated reports provide several key benefits:
- Convenience – Reports are automatically emailed to you and your team, no need to manually pull data.
- Accessibility – You can view the reports from any device, anywhere, since they arrive right in your inbox.
- Insights – The reports contain important abandoned cart metrics like abandonments, revenue lost, cart contents, and more. This data helps identify issues and opportunities.
- Collaboration – Multiple admins and stakeholders can receive the reports by email, enabling team-wide visibility.
With these scheduled, consolidated reports, you gain an easily accessible pulse on your site’s abandoned cart situation. The insights empower data-driven decisions to optimize cart recovery and recapture more revenue over time.
No more logging into dashboards or compiling numbers yourself. The reports make abandoned cart analytics seamless and shareable across your organization.
Connectors
↑ Back to topThe Connectors Tab will help you integrate the Abandoned Cart Pro for WooCommerce plugin with various Email Marketing platforms, CRMs, and so on. You will find the following integrations available in our plugin:
- WP Fusion
- Mailchimp
- ActiveCampaign
- Mailjet
- Hubspot
- Custom SMTP
- Klaviyo
- Sendinblue
- Drip
- FluentCRM
Integration with WP Fusion
↑ Back to topWP Fusion integrates WordPress with a wide range of CRMs. It keeps track of abandoned carts and sends customer details to your CRM even before they finish checking out. You can link your membership site, store, or learning management system to your CRM using WP Fusion alongside many WordPress plugins.
Pre-requisites
↑ Back to topTo make this integration successful, you will need the following:
- WooCommerce plugin
- v8.17.0 of Abandoned Cart Pro for WooCommerce plugin
- WP Fusion Pro version
- WP Fusion Abandoned Cart Addon Plugin
Remember that this plugin supports the Abandoned Cart feature for ActiveCampaign and Drip only.
1. WordPress Admin Settings
↑ Back to topInstall WP Fusion plugin from Dashboard > Plugin> Add New Plugin

Click the Activate button next

From the WooCommerce > Settings, click on WP Fusion.

Then go to the Setup tab on WP Fusion Settings.

The plugin provides a dropdown list of supported CRM platforms like ActiveCampaign, AgileCRM, Autonami, Autopilot and others.
However, the abandoned cart tracking feature currently only works with two CRMs:
- ActiveCampaign
- Drip
If you select any other CRM from the list, you can only sync general contact data from WordPress. The abandoned cart details and recovery workflows won’t be available.
To unlock abandoned cart tracking, recovery emails and related marketing automation, you need the paid “WP Fusion – Abandoned Cart Addon” for whichever CRM you use.

After that, you will have to add the relevant API URL and API key. To obtain your ActiveCampaign API URL and API Key, follow these steps:
Go to your ActiveCampaign account > Settings > Developer.

The Developer Settings page will load and display your ActiveCampaign API URL and API Key.

Copy and paste this information into the ActiveCampaign Configuration in the WP Fusion Setup and click Save Changes.
After that, you will need to activate the WP Fusion connector from the Abandoned Cart Pro plugin dashboard.
2. WooCommerce Admin Settings
Go to WooCommerce > Abandoned Carts > Settings > Connectors.


Click on settings on the WP Fusion box, then click on Activate.

Once activated, the below message will be displayed:

Once connected successfully, you get options to Disconnect along with Settings, and Sync. Clicking the Disconnect button will disconnect this integration.

Selecting the Settings button will take you to other settings if they will be required. The connection is successful in this case, so no other settings are required.

Clicking the Sync button will sync the newer abandoned carts with this CRM.
3. Workflow
↑ Back to topBrowse to your WooCommerce site. The next step is to abandon a cart. You can do it either as a Guest or as a logged-in User.

Email and phone numbers can be collected from the ATC pop-up, EI pop-up, Checkout page, or a custom form.

After an email is saved in our database, a contact will be created at CRM, in this case, ActiveCampaign.

An abandoned cart and tags are seen added to the contact’s activities.

Once the above steps are followed correctly, your integration with WP Fusion is complete!
Integration with Mailchimp
↑ Back to topThe Abandoned Cart Pro plugin allows you to integrate with MailChimp for powerful abandoned cart recovery workflows.
Once you connect the two systems, the plugin will automatically pass abandoned cart data from your WooCommerce store over to MailChimp. This includes details like the shopper’s email address, cart contents, and order total.
Within MailChimp, you can then create automated “Customer Journeys” that trigger based on this abandoned cart data. For example, you can set up a sequence of targeted email reminders to be sent out on a schedule after a cart is abandoned.
Pre-requisites
↑ Back to topTo make this integration work, you can use your existing Mailchimp account or create a new one. Remember that Abandoned Cart emails can only be sent through a Pro (paid) MailChimp account.
To make this integration successful, you need the following:
- WooCommerce plugin
- Abandoned Cart Pro for WooCommerce plugin
- A valid Mailchimp account
With Mailchimp, you can create or manage the following features:
- Contacts
- Accounts
- Lists
- Campaigns
Mailchimp settings
↑ Back to top1.1 Connect Abandoned Cart Pro to Mailchimp:
↑ Back to top
1. First, you want to ensure you have an API key. Go to Integrations > API keys > Create a key.

2. After that, go to WooCommerce > Abandoned Carts > WooCommerce Admin Settings > Connectors.
3. Click the Connect button for Mailchimp.

4. A popup will appear as below:

5 Enter the API key and click Next Step.
6. The list of available Audiences will be displayed. Select a list of your choice and click Next. If no default store is present in your Mailchimp account, the plugin will create one.

Once connected, you will get the options to Disconnect, go back to Settings, and Sync the details of the new abandoned carts to Mailchimp:

To create customer journeys or automation, you need a List and a Store.
Once a list is created, the user should ideally connect the Abandoned Cart Pro plugin to Mailchimp so the Store is auto-generated.
After that, you can create customer journeys or automation as needed.
1. Go to Dashboard > Audience > Audience dashboard.

2. Click the manage audience drop-down and choose View audiences.

3. Click Create Audience.

4. Input the Audience details and click Save.

5. When a user wants to connect Abandoned Cart Pro to Mailchimp, they will need at least one list present in their Mailchimp account to complete the connection successfully.
6. Each of the contacts captured by Abandoned Cart Pro in WordPress is sent to a specific Audience (List). The list to which they should be sent is selected in our plugin settings.
7. The Audiences present in your Mailchimp account will be reflected in the ‘Select Default List’ drop-down here.
MailChimp captures email addresses as contacts.
When a guest cart is captured from Checkout page, ATC, custom forms etc. the email address should be sent to MailChimp.

Abandoned Cart details should also be exported.

Each email address in a list can be viewed in Dashboard > Audience > All Contacts.

Revenue refers to the amount for which orders have been placed by the contact.
1. While Mailchimp offers a reminder email service for abandoned carts, there is no way of visibly checking the Abandoned carts, products list, or orders. All orders placed in WooCommerce must be exported to Mailchimp, whether the order is a recovered order or was not abandoned in the first place.
2. The Revenue amount shown for a contact is the only way to confirm whether an order was exported to Mailchimp correctly.
3. Cart count is displayed as:

4. To check if a cart is en-queued in the list for which Mailchimp will send reminder emails, go to Campaigns > Email Templates > View Report.

1. To be able to create Abandoned Cart Customer Journeys, it is necessary to link the same to an audience and a store. Therefore, connecting the Abandoned Cart plugin to Mailchimp is important before creating any emails.
2. You can select the available template for your needs.

3. Mailchimp offers merge tags that allow you to add abandoned cart information, such as product name, image price, etc, to your template.

4. Both cart and product information is sent to Mailchimp to ensure these details are correctly populated.
5. Each product abandoned on the site needs to be exported as an individual object to Mailchimp to ensure the details in the reminder emails are populated correctly.
6. These products are visible in Content Studio > Products.

7. To ensure products are exported correctly, it is mandatory to have a product image and product price.
8. If the above details are unavailable, the product, though exported to Mailchimp, will not be visible here.
1.6. Campaign and messaging settings
You can easily manage your Subscriber and Product settings in the Audience section.
Manage tags to apply to a subscriber after a transaction in Subscriber Settings.

You can define the product image size in the Product Settings.

The Abandoned Cart Pro integration with Mailchimp gives you powerful tools to create branded, personalized abandoned cart emails that drive conversions.
Once connected, you can fully design and customize the look and content of your abandonment email campaigns right within Mailchimp’s intuitive email builder.
This lets you infuse your brand’s voice, visuals, and style into every communication. You can also dynamically insert details like the shopper’s name, the specific products they abandoned, images, pricing info, and more.
But it’s not just about replicating their cart contents. You can get creative with engaging copy, product recommendations, special offers, discounts and other incentives crafted to win back their business.
The goal is to craft a branded, relevant, and hard-to-resist message sequence that makes them rethink abandoning their purchase.
After sending your abandonment campaigns, Mailchimp provides detailed performance data to analyze what’s working. This feedback helps you continually test different content approaches, offers, email cadences and more to optimize for maximum conversions over time.
By combining the abandoned cart data capture of the plugin with Mailchimp’s powerful journey builder, automation and analytics, you gain a full suite of tools to recover lost sales through strategic, personalized remarketing flows.
Integration with Mailjet
↑ Back to topThe latest version 8.15.0 of the Abandoned Cart Pro plugin for WooCommerce introduces a helpful integration with the email marketing platform Mailjet.
Mailjet allows you to send both marketing emails (like newsletters and promotions) as well as transactional emails (like order confirmations and notifications).
With this new integration, when a customer abandons their cart on your WooCommerce store, their email address gets automatically added as a new contact over in your Mailjet account.
This syncing of abandoned cart email addresses from your website to Mailjet happens seamlessly behind the scenes once you connect the two platforms.
The big advantage is that you can then view and leverage that list of contact emails for remarketing campaigns directly from within Mailjet’s dashboard and email tools.
Let’s get started with the integration process!
Pre-requisites
↑ Back to topTo make this integration happen, you will need the following:
- WooCommerce plugin
- Abandoned Cart Pro for WooCommerce plugin
- a valid account with Mailjet. You can log in to your Mailjet account here.
Mailjet has the following features that you can create:
- Contacts
- Lists
- Campaigns
- Automation and others
For the Abandoned Cart Pro plugin, we will be using Contacts and Lists.
A. Mailjet Settings
↑ Back to topWe’ll start by getting the API key first and then create a Contact List.
1) Getting the API Key
To get the API Key, you must go to the Mailjet Dashboard after logging in. You can navigate to your Account on the top right corner of your screen and then click on Account Settings. From there, you need to go to the REST API block and click on Master API Key & Sub API key management link as shown below:

This will take you to a page titled ‘API Key Management’. Here, you must copy both the API Key and the Secret Key.

We will use these two keys in the Abandoned Cart Pro admin section of our WooCommerce store, which will be explained later in section B.
2) Creating a List
Next, we will create a Contact List where all the email addresses captured with the help of the Abandoned Cart Pro plugin will be listed. Navigate to Contacts > Contact lists > Create a contact list as shown below:

Here, you will have to enter the name of your list. For example, we have named it ‘Abandoned Cart Contact List’. Select the round tick box beside the ‘Empty list’ from the List source since we’re integrating Mailjet with Abandoned Cart Pro using API. Once the integration is complete, all the new email addresses captured from the Abandoned Cart Pro plugin will be added to this empty list.

Press ‘Continue’ and proceed forward by clicking on ‘Create list’ as shown below:

The newly created list will appear under the Contact Lists:

Now, let’s move on to the Abandoned Cart Pro admin section of our WooCommerce store.
B. WooCommerce Admin Settings
Navigate to WooCommerce > Abandoned Carts > Settings > Connectors as shown below:

Scroll down to find the Mailjet option and click on ‘Connect’.

Once you click on Connect, a Connect With Mailjet page will appear. Enter the API and Secret Key you copied earlier from the Mailjet Dashboard in Section A above. In the empty box of ‘Enter API USER’, paste the API Key; in ‘Enter API Key, paste the Secret Key you have copied.
Once you have inserted them, you must select the ‘Default List’. The default list implies that all the new email addresses captured will be added to this list by default.
Thus, select the list that you had created earlier. For example, we created the ‘Abandoned Cart Contact List’, so we will select that from the Select Default List dropdown menu.

After that, you can click on the ‘Save’ button. A message saying ‘Connected successfully’ will be displayed to you once the integration is established:

If you do not see this message, we request that you re-check the API Key and Secret Key that’s been entered. Copy it again from the Mailjet Dashboard & paste it in the designated area once again.
Once connected, you will get the option to Disconnect the integration, option to go back to the previous Settings in order to update them, or Sync the newer abandoned cart details to this integration:

Now, let’s find out how this integration works. Let’s say the Abandoned Cart Pro plugin captured a guest user’s Email address and Name. You can see the details of this in your store by going to WooCommerce > Abandoned Carts > Abandoned Orders.
Now, to see if this information is in your Mailjet dashboard, go to Contacts > Contact lists > Abandoned Cart Contact List as shown here:

The email address has been added to your list successfully, as displayed above. This information will be added to your Contacts as well. If you wish to find it under all your Contacts, you can search for it in the Search tab as shown below:

If you click on the email address, you will get to view some additional details as shown below:

If the user added other details such as Name or Phone Number, then those details will also appear when you click on the ‘Contact Properties’ section:

This way, you can successfully integrate the Abandoned Cart Pro plugin into your Mailjet account.
In Summary
↑ Back to topUsing the email addresses captured from the Abandoned Cart Pro plugin will be extremely beneficial because you can set up different email marketing campaigns on Mailjet & target them to these customers easily!
Note: Reminder Emails will continue to be sent from the Abandoned Cart Pro plugin even after setting up this integration.
Integration with HubSpot
↑ Back to topHubSpot is a well-known Customer Relationship Management (CRM) tool that helps businesses manage leads, sales, and marketing efforts. One of its useful features is the ability to track and manage abandoned shopping carts, as well as set up automated workflows to recover those potential sales.
In this section, you’ll learn how to integrate the Abandoned Cart Pro for WooCommerce plugin with Hubspot. This integration will allow you to automate your abandoned cart recovery process, making it easier to bring back customers who didn’t complete their purchases.
To send information about abandoned carts from your WooCommerce website to your HubSpot CRM, all you need to do is connect the two systems using the Abandoned Cart Pro for WooCommerce plugin. It’s a simple process that will link your online store with HubSpot.
Here is how it can be integrated with our plugin.
Pre-requisites
↑ Back to topTo make this integration happen, you will need the following:
- WooCommerce plugin
- Abandoned Cart Pro for WooCommerce plugin
- A paid account with HubSpot. You can log in to your HubSpot account here.
Here’s all that will be covered:
1. Obtaining API Key in HubSpot
2. Connecting WooCommerce Store to HubSpot
3. Finding default property groups, properties, lists & workflows in HubSpot
4. Managing Contacts
5. Managing Carts
6. Creating Workflows
1. Obtaining API Key in HubSpot
↑ Back to topHubSpot allows users to have multiple accounts attached to a single HubSpot login. The only thing that Abandoned Cart Pro for WooCommerce plugin needs to connect to HubSpot is the API Key.
In order to find this API key, go to HubSpot > Select your account > Settings > Integrations > API Key > Go to Private apps as shown below:

Under Basic Info, add a name to your private app, insert a logo, and add a description.

Now, move on to Scopes tab and find the CRM dropdown:

Tick the checkboxes for all the Read and Write settings of CRM:

Go to the Settings dropdown and tick the checkboxes for all the Requests:

Once done, your selected scopes will appear together, as shown below. Then simply click the Create app button:

A token will be created once you click the Continue creating button:

Press the Show token option so that the entire token is visible to you. Copy it and save it in a safe place somewhere in your personal notes. This token will be utilized later on your WooCommerce site.
Click the Close button once done.

You will get to see the Overview page with all the API details. Go to the AUTH section:

This is where you will find the created token. Copy it from here in case you require it again:

You will use this key to integrate HubSpot with your WooCommerce store.
2. Connecting WooCommerce Store to HubSpot
↑ Back to topGo to WooCommerce > Abandoned Carts > Settings > Connectors

Click ‘Connect’ on the HubSpot Option and then click on the ‘Connect’ button.

You will be prompted to fill in the API key from your HubSpot account. Paste the earlier copied API key in the box that appears like this.

Click on ‘Save’. Once connected, it will look like this:

You can Disconnect the integration, go to the Settings option if you wish to revisit the Token or click the Sync button to sync the details of newly abandoned carts to HubSpot.
Please note that by default, HubSpot does not have any data related to your cart.
Thus, in order to be able to send reminder emails, you will need to create this setup first:
- Property Groups – Groups are collections of relevant properties.
- Properties– Properties store specific data of each object eg. Contacts, Billing Addresses, etc
- Lists– A list is where all the contacts that have abandoned carts on your site will be stored.
- Workflows– The workflow will allow the user to send automated emails.
These property groups, properties, lists & workflows will get created in Hubspot automatically when the ‘Save’ button is clicked.
3. Finding default property groups, properties, lists & workflows in Hubspot
↑ Back to topWe will start off with Properties.
A. Properties
↑ Back to topGo to your HubSpot Account > Settings > Data Management > Properties

You will notice that 10 properties relating to the ‘Abandoned Cart Details from AC Pro’ group will get created automatically.
B. Property Group
↑ Back to topTo find a Property Group related to the integration, go to your HubSpot Account > Settings > Data management > Properties > Groups.

You will find that 1 property group with the name ‘Abandon Cart Details from AC Pro’ is created.

C. Lists
↑ Back to topTo find lists related to the integration, go to your HubSpot Account > Contacts > Lists

Here, you will notice that 1 list is formed and gets a name – ‘Abandoned Carts List’

D. Workflow
↑ Back to topTo create workflows through this integration, go to your HubSpot Account > Automation > Workflows

1 workflow is created, which is OFF by default; this will be switched ON once you create a workflow. This needs to be in the status ‘ON’ for the workflow to function.

4. Managing Contacts
↑ Back to topEvery time a registered user or guest abandons a cart at checkout, their contacts are tracked by the plugin (registered & guests from the billing field at checkout).
You can find the captured email address by going to WooCommerce > Abandoned Carts > Abandoned Orders.

This is then exported to HubSpot immediately. The same can be seen in HubSpot Dashboard in Contacts > Lists

Select the Abandoned Carts Lists.

The contact gets added to the list automatically because you have set up a property ‘wcap_abandoned_cart’ to ‘yes’.

You will learn more about this in the workflow section below, where you will create the automated workflow.
5. Managing Carts
↑ Back to topSince carts are not separate objects in HubSpot, abandoned cart details are set up in custom properties in each of the contacts.
The same can be seen in Contacts > Select the same contact

Go to Actions > View all properties:

Go to the Abandoned Cart Details from the AC Pro dropdown:

You can edit the details here to meet your needs.
The carts are exported to Hubspot as soon as they are created. If the cart is updated in WooCommerce, then the same will be reflected in HubSpot. Usually, it does not take more than a minute or two for the changes to be reflected.
6. Creating Workflows
↑ Back to topNow that all the background prerequisites are set, the next step is creating an Abandoned Cart Email Series for your customers with the help of ‘Workflows’.
Workflows are necessary to send automated reminder emails. Note that Workflows are NOT available in HubSpot’s free account since it’s a paid feature.
To create one, go to Automation > Workflows:

The default workflow created by Abandoned Cart Pro for WooCommerce plugin is set up such that contacts are auto-added to the workflow when the contact has a property ‘wcap_abandoned_cart’ to ‘yes’
You can set up a default delay of 30 minutes in the workflow. The same can be edited by the user as needed.

Emails can be added to the workflow as follows: Add an action by clicking on the ‘+’ sign.

Now, a sidebar will pop up next to the workflow. Here, you can choose an action you want to perform.

To create an email, go to External Communication > Send email

Now, a window with an Option ‘Create new email’ will open up. Click on the ‘Create new email’ button.

Now, another window will open with all the options to create and customize your email.

You can personalize this email that will be received by your customers the way you like it. To add cart details (which are saved as properties), you need to add customized tokens. This can be done using the ‘Personalize’ Option

Abandoned Cart Products HTML token is used for the cart table.


Next, the Checkout URL:


More such tokens are available and can be set up as needed.
Once you are done planning all your actions, you need to click on the Review & Publish button to switch ON the workflow.

The ‘History’ section under ‘Abandoned Cart Workflow’ shows a history of all the email addresses to which emails have been sent.

Know that the waiting periods to perform a particular action can also be customized in the workflow. If a contact is waiting for the time to be reached, the contact is considered an active contact.
Apart from the default workflow, you can also create your own workflows in HubSpot. While creating this, you need to ensure the trigger is included correctly to ensure all the email addresses exported by Abandoned Cart Pro for WooCommerce plugin are included in the workflow.
We hope this section has been helpful in providing the required information to connect your store to HubSpot and start automating your leads and maximizing profits!
In Summary
↑ Back to topBy integrating these two tools, you’ll be able to convert your website’s visitors into leads more effectively. HubSpot will automatically receive data about abandoned carts, allowing you to centrally manage your marketing and business processes, including sending automated reminders or promotional offers to encourage those shoppers to complete their purchases.
Integration with Custom SMTP
↑ Back to topSMTP (Simple Mail Transfer Protocol) is a standard technology email servers use to send and receive messages reliably. It provides an alternative way for websites to deliver emails instead of using the default PHP mail function or other WordPress email plugins.
The latest version, 8.15.0, of the Abandoned Cart Pro plugin for WooCommerce, introduces support for custom SMTP services for sending your abandoned cart recovery emails.
This SMTP integration allows you to leverage third-party email delivery providers like Gmail, Outlook, SendGrid, etc., to handle sending abandoned cart reminders and notifications from your WooCommerce store.
Pre-requisites
↑ Back to topTo make this integration happen, you will need the following:
- WooCommerce plugin
- Abandoned Cart Pro for WooCommerce plugin
- a valid account with an SMTP server.
This integration will work with various SMTP servers. Some of them include:
- Sendinblue
- Mailgun
- SendGrid
- Amazon SES
- SMTP Email Relay Services, etc.
Note: This integration is not merely restricted to the ones mentioned in the above list. You can connect the Abandoned Cart Pro plugin using several other SMTP servers.
For this guide, we will connect using a Gmail account.
Gmail Settings
↑ Back to topIf you wish to integrate using Gmail, you must configure an extra setting that enables ‘Less secure apps access’.
To do this, first, you will have to go to your Gmail Account and find the ‘Manage your Google Account’ setting as shown below:

Afterward, go to ‘Security’ and find the ‘Less secure app access’ setting. By default, it will be turned off as shown here:

Click on the ‘Turn on access’ option, which will redirect you here:

Enable the setting by switching it on, as shown in the above image. Once you go back, you’ll see that the ‘Less secure app access’ is switched on, as shown here:

Note: You may not have to configure this additional setting in other mail services. You will require credentials such as SMTP host, port, etc. for other mail services. The additional steps, i.e., the ones covered above, will vary from provider to provider.
WooCommerce Admin Settings
↑ Back to topWe will move on to our WooCommerce store and configure the settings from the Abandoned Cart Pro plugin admin section.
First, go to WooCommerce > Abandoned Carts > Settings > Connectors. Find the ‘Custom SMTP’ option and click on the ‘Connect’ button:

Here, you will have to enter all the relevant SMTP settings such as SMTP Host, SMTP Port, SMTP Encryption (None, SSL or TLS), SMTP AutoTLS (only if SMTP encryption is not TLS), SMTP authentication (use the toggle switch to enable), SMTP Username (visible if SMTP authentication is on) and SMTP Password (visible if SMTP authentication is on) as shown here:


The SMTP username will be your Gmail email address, and the SMTP Password will be your Gmail password. Below, in the empty field of Send a test email to, enter the email address where you would like to send a test email.

After the email has been sent, you will see the message displayed below the email field ‘Email sent.’

Check if you have received an email. It would look like this:

Once you receive the above mail, you can click on the ‘Save’ button and your Custom SMTP server connection will be established for you.
In this way, you can successfully integrate the Abandoned Cart Pro plugin with a Custom SMTP server- in our case, Gmail. Once connected, you will get the options to Disconnect the integration or go back to Settings to edit them:

Let’s say that with the help of our plugin’s ATC Popup feature, you have captured the email address of a guest user.
Whether it’s a guest user or a logged-in user who has abandoned their cart, the reminder emails that will be sent to them from now on (i.e., after integrating with your Custom SMTP server) will be from [email protected] (i.e., your Gmail server).
Here’s what the reminder email will look like:

As you can see, the email from your WooCommerce store has been sent using the Custom SMTP settings.
Note: After activating your Custom SMTP server, all emails from the Abandoned Cart Pro plugin will be sent, thus overriding any other settings on the site. As long as the connector is active, you will receive all emails from the site from your custom SMTP server, i.e., Gmail in this case!
Integration with Klaviyo
↑ Back to topThe latest v8.17.0 of the Abandoned Cart Pro plugin for WooCommerce introduces a new integration with Klaviyo, a popular email marketing automation platform.
Many eCommerce stores use Klaviyo to automate their email and SMS marketing campaigns. With this integration, you can now leverage Klaviyo to recover abandoned carts from your WooCommerce store with the help of our Abandoned Cart Pro plugin.
Here’s briefly how it works:
- When a customer abandons their cart on your site, the plugin captures key details like their email address and the cart contents.
- This abandoned cart information automatically syncs to your connected Klaviyo account from the plugin.
- Within Klaviyo, you can then create automated email and SMS sequences targeted specifically at these abandoning customers.
- These automated flows can include cart reminders, discounts, product recommendations, and other messaging aimed at encouraging customers to return and complete their purchases.
Now let’s find out the steps of this integration below:
Pre-requisites
↑ Back to topTo make this integration happen, you will need the following:
- WooCommerce plugin
- v8.17.0 of Abandoned Cart Pro for WooCommerce plugin
- A valid account with Klaviyo. You can log in to your Klaviyo account from here.
Klaviyo offers different features that can be created. They are:
- Profiles
- Lists/Segments
- Campaigns and Flows
However, for this integration, you will only need to use Profiles, Lists, and Flows.
A. Klaviyo Admin settings
↑ Back to top1) Get API Key
The first thing that you’ll need to do is grab the API Keys. Go to your Klaviyo Dashboard > Account as shown here:

Click on Settings and then API Keys:

Copy the ‘Public API’ Key and ‘Private API’ Key from here:

You will be required to paste these into your Abandoned Cart Pro admin dashboard. This will be covered in section B. WooCommerce admin settings below.
2) Create a List
Next, you will have to create a list where the details of abandoned carts from your WooCommerce store will be stored. To do this, go to Lists & Segments > Create List /Segment:

Choose the ‘List’ option

Next, you will have to name the list. Let’s name it ‘Abandoned Carts from store’. Once done, click on the ‘Create List’ button:

A new list will be created, as seen below. Now go back to the Lists & Segments tab, where you will find this new list that has been created. Click on the three dots of this list and select ‘List Settings’ as shown below.

Scroll down to ‘Opt-In Process’ and select the ‘Single Opt-in’ option. Lastly, click on ‘Update List Settings’.

You have now configured a list. Next is creating a workflow to send email reminders for abandoned carts.
3) Create a Flow
↑ Back to topTo create a workflow, go to the Flows tab and click on the ‘Create Flow’ button.

Next click on ‘Create From Scratch’ on the top right corner.

You can now name this new workflow as per you liking. Let’s name it ‘Abandoned Carts from store’ and click on ‘Create Flow’.

This Flow will be triggered upon Event/Metric ‘Created Cart’. For this, we will add a Metric first.

The metric will be ‘Flow Trigger’, and under ‘What action will trigger this flow’, you will have to select ‘Created Cart’ and then click on ‘Done’.

Next, let’s add a Time Delay. Drag it and add it to the flow:

Set the delay as per your need. This would mean that after a delay of your selected time or days/months, the person who abandoned the cart, will receive an abandoned cart email via Klaviyo. You can add the delay in minutes, days, or months. For now, we are adding a delay of 30 minutes and click on Save.

Now, add a ‘Conditional Split’ logic.

Then choose ‘What someone has done (or not done)’ as the condition. Under this, select ‘Deleted Cart’ from the drop-down menu of ‘Person has’ field and click on Save.

Over here, additional conditions can also be added using the ‘OR’ button. Apart from ‘Deleted Cart’, we can also add ‘Ignored Cart’ or ‘Recovered Cart’.

Proceeding forward, if the condition is Yes, then it will exit the flow. If No, then we will send an email. You can create this email by going to Actions and selecting Email. You select these conditions according to your needs.

Click on the Edit option of this email to configure and edit its details.

You can edit the sender’s name, email address, subject, and text here. Next, select the 3rd option, ‘HTML,’, and click on ‘Start Coding’.

Here, Event/Metrics-based variables can be added to the email template by clicking on ‘Preview Email’. Click on variables from events as shown in the image attached below:

Once done, click on Save.

After the Email is added, set it to ‘Live’.

Lastly, Save it and Exit.

B. WooCommerce Admin settings
Once the settings are configured from Klaviyo’s side, it’s now time to configure them from your WooCommerce Abandoned Cart plugin dashboard’s side. Go to WooCommerce > Abandoned Carts > Settings > Connectors. Go to the Klaviyo and press Connect.


Now, enter the Public and Private keys that you copied earlier from your Klaviyo Dashboard.
After entering them and clicking on ‘Next Step,’ you will be asked to select a default List. Since we created the ‘Abandoned Carts from store’ list, we will choose it and save it.

Once connected, you will see the options to Disconnect the integration, the Settings option to update them, and the Sync option to sync the new abandoned cart details.

The Sync button will also be visible to you once a connection is established. This button helps sync any carts that were captured by the plugin after the connection has been activated and were not exported due to some reason when the carts were captured. If you wish to learn how individual carts can be exported, then read this doc.
If the integration fails, then one common solution to try out is re-checking the API URL & API Key by copying & pasting them again.
Once the integration is established, the Abandoned Cart Pro plugin will start sending all the new abandoned cart user information (email address, first name, last name) to Klaviyo. Note that the previous abandoned cart information will not be sent.
From there, Klaviyo will send emails to all abandoned carts.
Let’s say a guest user abandoned their cart, and with the Abandoned Cart Pro plugin, you captured their email address. This email address will be available on your Klaviyo Dashboard under ‘Profiles’ as a Contact, as can be seen below.

If you click on this email address, you will get all the additional contact details, such as Phone Number, Name, etc., depending on whether they are captured on your WooCommerce site.
Mind you, this contact will be added to the ‘Contact List’ and saved in the settings.
You will also be able to find Metrics/Events like ‘Created Cart’, ‘Modified Cart’, ‘Deleted Cart’ etc, from here.

Moreover, You will also be able to see if the Abandoned Cart reminder email was sent or not over here. As you can see in the image above, an abandoned cart reminder email was sent to this email address, and the customer has even opened it.
This is how you can easily integrate Klaviyo with Abandoned Cart Pro to configure and enable the capture of key details, set reminder emails, and check the status of abandoned carts.
In Summary
↑ Back to topBy connecting your WooCommerce data to your Klaviyo marketing campaigns, you eliminate manual efforts while unlocking powerful abandoned cart recovery capabilities.
Customers automatically receive timely, relevant remarketing based on their cart activity – maximizing your chances of recovering those potential lost sales.
Integration with Brevo (Sendinblue)
In the latest v8.18.0 of the Abandoned Cart Pro for WooCommerce plugin, you can now integrate it with Brevo (previously Sendinblue). Brevo is a marketing automation tool that can help you with sending emails, SMS, and more!
This integration will allow you to send customer email addresses and abandoned cart information to Brevo (Sendinblue). Once the data is transferred, you can use Brevo’s features to send reminder emails and other marketing campaigns to these shoppers who abandoned their carts.
Let’s find out how it can be done.
Prerequisites
↑ Back to topTo make this integration happen, you will need the following:
- WooCommerce plugin
- v8.18.0 of Abandoned Cart Pro for WooCommerce plugin
- a valid account with Brevo (Sendinblue). You can log in to your account here.
We will need to grab the API and marketing automation keys and create an Abandoned Cart Workflow.
A. Brevo (Sendinblue) Admin settings
↑ Back to topA. Getting the API Key and Marketing automation key:
↑ Back to topGo to your Account > SMTP & API to fetch the API key.
 1")
You will have to create a new API Key if one does not exist already for you. So, click on the ‘Create a New API Key’ button.
 2")
Enter the name you want to give to this API Key and click ‘Generate’.
 3")
Now, you need to copy this key once it’s generated. Please make sure to copy the key correctly and save it somewhere because Brevo (Sendinblue) does not allow us to copy the key at a later stage.
 4")
After clicking on ‘OK’, your newly added Key will be saved. Now, you need to grab the Marketing Automation Key. For this, go here and select JS tracker.
 5")
Scroll down below to find the JS code. Find the words client_key and copy the key located just beside it.

This client key is the Marketing Automation Key. We will require these two keys later when we go to section B. WordPress Admin Settings.
B. Creating an Abandoned Cart List
↑ Back to topTo ensure that all the new abandoned cart contacts from your WooCommerce store get saved in one place, you need to create an ‘Abandoned Carts’ list. Go to Contacts > Lists > Add a new list.
 6")
Enter the name ‘Abandoned Carts’ and click ‘Create an empty list’. You can name this list to whatever you would like.
 7")
It will appear like this once this list is created:
 8")
If you wish to skip this step, then you can do so. When connecting the Abandoned Cart Pro plugin, if no list is available in the Brevo account, our plugin will create one for you.
C. Creating a Workflow
↑ Back to topNext, you need to create a workflow. Go to Automations > Workflows > Create a Workflow.
 9")
Select the template Abandoned Cart and click on the Create button.
 10")
 11")
It will display the trigger point, a.k.a the start point for the workflow, like this:
 12")
After clicking on ‘Next‘, you will have to add a delay. Add as per you want it:
 13")
Since you’ve selected the default Abandon Cart template, all the desired merge tags for cart data will already be present. Use the same.
 14")
Now, you will have to set the exit workflow option. Choose Custom Event and add order_completed.
 15")
You will have to add other events too. Such as cart_deleted:
 16")
And cart_updated. Click on Finish once done. These steps are available by default in the ‘Abandoned Cart’ workflow. You may simply have to click on ‘Next’ when the pop-ups/prompts appear.
 17")
All of the Existing Settings of your workflow will appear as such:
 18")
You will now have to Delete the restart condition by clicking on Edit conditions:
 19")
Click on the Delete option:
 20")
Press ‘Yes, Delete it’.
 21")
Thus, your final set of exit conditions will appear like this:
 22")
Lastly, activate the workflow by pressing the button in the top right corner. Your activated workflow will look like this under the Workflow section:
 23")
Note: Along with activating your workflow, you will also have to ensure that the email template that you have added in this workflow is activated. If you wish to make any changes to the email content then follow these steps:
Go to Campaigns > Templates. Here you find all your email templates. Let’s press the Edit option of the email template that we had added to our workflow:
 24")
Click on Edit email content:
 25")
Now you can add the logo of your business or edit the default text to whatever you would like:
 26")
You can even edit the merge tags of the abandoned product. For example, you can change the default merge tag {{CONTACT.NAME}} to {{CONTACT.FIRSTNAME}}, which is the default tag used for the first name in the contact.
 27")
Once done, click on the ‘Save & quit’ button.
 28")
B. WordPress Admin Settings
↑ Back to topOnce all the settings have been created in Brevo, it’s time to head over to your WordPress Dashboard.
Go to WooCommerce > Abandoned Carts > Settings > Connectors.
 29")
Scroll down and select the ‘Connect’ option for Brevo (Sendinblue):
 30")
Enter the API Key and the Marketing Automation Key that you noted down earlier. Next, you will be displayed all the lists found in your Account. Select the list of your choice. We will go with the ‘Abandoned Carts’ list and click on Save.
 31")
Once the connection is established successfully, the plugin will display this message!

Once connected, you will see the options to Disconnect, update your previous Settings or Sync the data of the newly abandoned carts.
 32")
Let’s say that a customer abandons their cart in your store. The product that they’ve abandoned is a ‘Designer Scarf’.
This guest user has only entered their email address which was captured by the ATC modal of our plugin. The abandoned cart reminder email will thus be sent from Brevo, and it will appear like this:
 33")
 34")
Now, if you wish to view the details of this abandoned cart in Brevo, you can go to Contacts. Here, it will simply show the email address, first name & last name which was exported. Please note that no cart events will be displayed in Contacts.
 35")
Next, if you wish to check if the cart was exported properly, then go to Automation > Logs. It will show you the detailed steps of what happened to the newly added contact.
 36")
Furthermore, if you wish to view the Workflow stats, then go to Automations > Workflows > [your workflow] > Stats
 37")
 38")
It will show you the number of contacts that were added to the workflow, how many contacts received the reminder emails, etc:
 39")
Lastly, it will show the open rate for the emails sent!
 40")
In Summary
↑ Back to topAs you can see, you can simply connect the Abandoned Cart Pro for the WooCommerce plugin with Brevo. This integration will allow you to automatically send reminder emails to customers who have abandoned their shopping carts on your WooCommerce store. By sending these reminders, you can effectively recover potential sales and boost your online store’s revenue.
Integration with Drip
↑ Back to topThe v8.18.0 of the Abandoned Cart Pro for WooCommerce plugin allows you to connect it with Drip. It is a marketing automation platform that helps you grow your e-commerce business by creating automated workflows and sending marketing emails, SMS messages, and more.
With this integration, you can send information about abandoned shopping carts and the email addresses of customers who abandoned their carts to Drip. Once this data is shared with Drip, you can use its features to send reminder emails and other marketing campaigns to shoppers who haven’t completed their purchases.
Let’s find out the integration steps below:
Prerequisites
↑ Back to topTo make this integration happen, you will need the following:
- WooCommerce plugin
- v8.18.0 of Abandoned Cart Pro for WooCommerce plugin
- a valid account with Drip. You can log in to your Drip account here.
We will need to grab the API Token, Account ID, and create an Abandoned Cart Workflow.
A. Drip Admin settings
↑ Back to top1. Getting the Account ID and API Token from Drip
↑ Back to topThe first thing you need to do is get your Account ID. For this, log in to your Drip account and go to Settings > Account.

Next, you need to get the API Token. Go to the right-hand top corner and click on Account > User Settings:

Under settings, click on User Info:

Scroll down and find the API Token as shown here:

After copying them down, we will keep them aside. We will require them so that we can paste these in your Abandoned Cart Pro admin dashboard. This will be covered in section B. WooCommerce admin settings ahead.
2. Creating a Workflow
↑ Back to topFor this, go to Drip > Workflows > Workflows > New Workflow:

On the right-hand side, find the ‘Start from Scratch’ option and click on it:

Next, click on ‘Define your trigger’.

It will display a popup from where you can find the ‘See more events’ and click on it

Select ‘Drip Shopper Activity API’ and ‘Created a cart’.

Click ‘Update Trigger’. This will add a trigger for our workflow. Next click on the + icon.

We will now have to add a delay after which the email would be triggered. Click the ‘Delay’ option:

Set the delay to whatever you want. This would mean that after a delay of the select time period, the person who abandoned the cart will receive an abandoned cart email via Drip. You can add the delay in minutes, days, or months.
Important Note: Please ensure to set the delay in a way where you consider two things:
- the time needed to set up car abandonment in our plugin
- the first delay before an email is sent
This is because once you have successfully integrated our plugin, it will start exporting the carts to Drip.
A longer wait period (let’s say a minimum of 30 mins) ensures that all of these carts are exported successfully. A shorter delay of 5 mins is therefore not advisable.
So let’s go with 30 Minutes and click on ‘Update Delay’.

Now, the delay has been added to our workflow as you can see in the image below. After this, you will have to click on ‘Action’:

Here we will add our abandoned cart email. This action of sending an email to a person will therefore be sent after a delay of 30 minutes. So to add the action, we will select ‘Drip’ and ‘Send an email to a person’. We will also go with the ‘Visual Builder’:

You can add some General details, but most importantly we need to edit the email content. So click on the ‘Edit Email’ button:

You can go with ‘Drip templates’ or create a custom email template by clicking the ‘Start from scratch’ option:

Here, you will find different options such as adding Images, Products, Cart Abandonment information, and so on.
Please Note: You should be able to see the Cart Abandonment merge tag once some carts are logged into your Drip account. We would suggest that you complete the connection first, abandon a cart or two and then try to set up the email content. So, for this, you can edit the email content of this workflow later, but save the email template and name the workflow as ‘Abandoned Carts’.

After this, configure the settings under the ‘B. WordPress Admin Settings’ section. Once done, abandon a few carts and come back here again to complete the email action setup.

Once you click on the Cart Abandonment option, the following will be displayed to you:

Drip will automatically add the relevant merge tags once you choose this option.
As we said earlier, you can add images such as your Company’s logo or something else!

You can use the Return to Cart merge tag to add the Checkout link to redirect the user to the saved cart on the site as well.
Once done, you can save the email template. You can go back to the page where you edited the content. From here, you need to ensure that ‘Resend this email each time a person triggers this action’ is ON so that this email is resent for each new cart created.

Now, you can go back to your workflow and add as many more delays and emails as needed in the workflow.
We’ve added a name to the workflow so that would also be displayed. Finally, activate it.

Your workflow is now set up!
Important: If a user recovers the cart at some point, the Abandoned Cart Pro plugin will unsubscribe the user from the workflow & no further reminders will be sent to them.
B. WordPress Admin Settings
↑ Back to topWe will now go to our WordPress Dashboard and configure the settings there:
Go to WooCommerce > Abandoned Carts > Settings. Find Connectors > Drip and then click on Connect.

Enter the API token and Account ID and click on ‘Next Step’

After clicking it, the plugin will then display a list of workflows found in your Account:

After selecting your Workflow, click on ‘Save’. When the integration is successful, the following message will be displayed:

Once the connection is successful, you will get the option to Disconnect, edit your previous Settings and Sync the data of the newly abandoned carts:

Now that you’ve established the connection, the information about the abandoned carts will be sent to your Drip account.
C. Abandoned Carts in Drip
↑ Back to topGo to Drip > People > Active. Here, you will find the contact information as a list of emails.

Click on any one of the email addresses to see the contact details:

Once there, click on the Profile, tags & fields option.

It will show you different user details such as First Name, Last Name.

After seeing this, you can scroll down to see the cart details. When you click on ‘Website Sessions’ it will show you that a cart was abandoned by this email address:

Once you click on the + icon, it will show you that a Cart was created and the product that was in the cart which was abandoned when the contact was created:

Please note: If you have added more products or modified the cart, an ‘Updated Cart’ event will be fired. This event will be captured in Drip but it will not be reflected in the Website Sessions UI.
However, the last updated cart details will be correctly displayed in the reminder email which is sent to the customers.
Here’s the email reminder that was sent to your customer:

If the cart is recovered or the user completes the purchase in the first round, the plugin will send the WooCommerce order details to Drip as well. You can view them by going to People > Active > [email address] > Orders:

There you go; your integration with Drip is successful.
In Summary
↑ Back to topBy taking advantage of this integration, you can easily reach out to potential customers who showed interest in your products but didn’t complete their orders. This can help you recover lost sales and boost your online store’s revenue.
Integration with FluentCRM
With the v8.18.0 of the Abandoned Cart Pro for WooCommerce plugin, you can now connect it to FluentCRM, which is a WordPress-based Customer Relationship Management (CRM) system that offers many useful features like contact management, list building, tagging, and automation.
This integration allows you to send information about abandoned shopping carts, along with the email addresses of customers who left items in their carts, directly to FluentCRM. Once this data is transferred, you can use FluentCRM’s capabilities to send reminder emails and other marketing campaigns to shoppers who haven’t completed their purchases.
Prerequisites
↑ Back to topTo make this integration happen, you will need the following:
- WooCommerce plugin
- v8.18.0 of Abandoned Cart Pro for WooCommerce plugin
- Free version of the FluentCRM plugin from the WordPress plugin library.
- FluentCRM PRO plugin. Login here and download the Pro version file. Upload it to your WordPress site.
1. Creating REST API
↑ Back to topFirstly, you will have to create a REST API key. Go to FluentCRM > Settings > Managers > Add New Manager.

Add a manager from one of your existing users. Go for one who does not have admin access to your site- choosing a Customer role would be appropriate here. Enter the email address of the same. After entering, select the permissions check boxes and then click ‘Confirm’.

Now go to the REST API tab and click on the ‘Add New Key’ button as shown here:

You can add a name to your key. Let us go with the name ‘AC Pro’. Under Associate FluentCRM Manager, you will select the user email you had added earlier as a Manager. Once done, click on ‘Confirm’.

Your REST API Key will be created. Copy the API username and password and save them for later.

2. Creating a List
↑ Back to topNext, you will have to create a List where all the contacts captured by the Abandoned Cart Pro will be sent. Go to Contacts > Lists.

Click on the ‘Create List’ button located in the top right-hand corner.

Give a Title to the List and click on ‘Confirm’.

3. Connecting FluentCRM with the Abandoned Cart Pro plugin
↑ Back to topNow you need to connect FluentCRM with the Abandoned Cart Pro plugin. Go to WooCommerce > Abandoned Carts > Settings > Connectors:

Scroll down and find the FluentCRM option. Click on the ‘Connect’ button:

Enter the API Username and Password that you had collected earlier and click on ‘Next Step’:

You will get the option to select a default list where the contacts captured by the abandoned cart will be sent. Since we had created a list called Abandoned Cart for this, we’ll select it and click on ‘Save’.

Once you’ve connected successfully, it will display the following message:

When the integration is successful, you will get the options to Disconnect the integration, edit the previous Settings or Sync the data of the newer abandoned carts:

After connecting the integration, the custom contact fields will be added. These are the fields that you can use in the email that will be sent to your customers. You can find them by going to ‘FluentCRM’ > Settings > ‘Custom Contact Fields’.

Now, you need to create an automation to send emails.
*Note: It doesn’t matter whether the Abandoned Cart Pro plugin is connected to FluentCRM or not – The Abandoned Cart Pro plugin will continue to track abandoned cart users’ details every time. When connected with the FluentCRM, the tracked abandoned cart user details will be synced to the desired list in the CRM.
4. Creating an Automation
↑ Back to topLet’s go to FluentCRM > Automations. Please click on the ‘Create a New Automation’ button once you reach there:

Choose a name for the ‘Internal Label’. We have gone with ‘AC Pro’. Then, click on ‘Tag Applied’ and ‘Continue’.

Under ‘Select Tags’ go with the ‘Created Cart’ tag. This would mean that the tag will get assigned to a contact, and then the contact will be auto-added to the automation.

After this, you can check the ‘Restart the Automation Multiple times for a contact for this event’ option. If you wish to restart the automation for the same contact, please enable it. Finally, click on the ‘Save settings’ button.
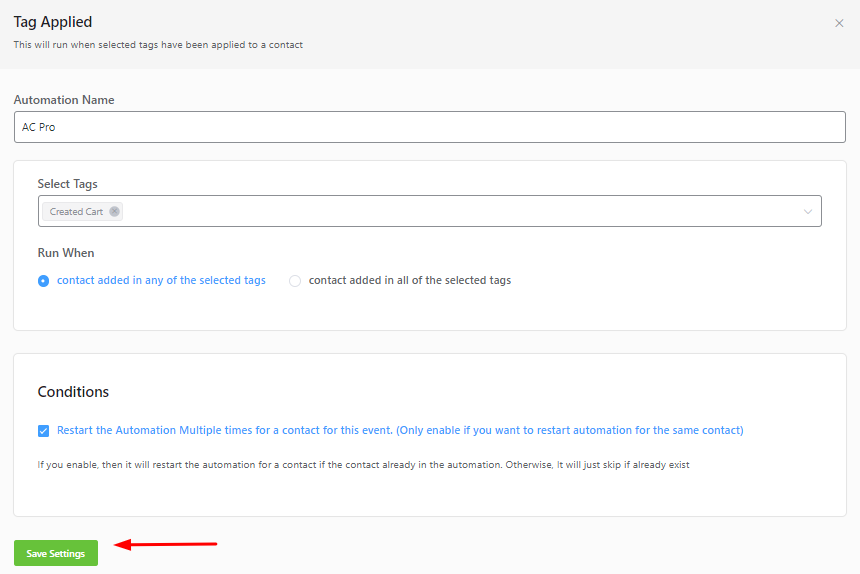
The automation will be created as shown below:

Next, click on the + icon to add the waiting period. Go to Actions > Wait X Days/Hours option:

Choose the time you want to wait till the next action takes place. Let’s go with 30 minutes and click on ‘Save Settings’. Ensure to keep a gap of at least 30 mins here.

The next step is to add ‘Conditionals’. The conditional check is important to add to ensure that the cart was still abandoned (after 30 mins of creation). If it remains abandoned, we will need to send them an email reminder. If it is no longer abandoned, then we would not have to send any reminders!
Moving on, you will have to choose ‘Has in Selected Lists’. This means that a contact added to a particular list will be the one that will receive the email from this workflow.

You will have to select the list that you saved in Woocommerce > Abandoned Carts > Connectors > FluentCRM settings. Click on ‘Save Settings’ once done.

The workflow will appear with 2 paths: ‘No’ and ‘Yes’ as such:

Click on ‘Add Action’ in the ‘No’ path and choose ‘End This Funnel Here’. We’re ending the funnel here because a contact that has not been added to the list will not be required to send anything.

Click on ‘Save settings’.

The workflow will appear like this and then we’ll go to ‘Add Action’ under the Yes pathway.

Choose the ‘Send Custom Email’ option. We’re selecting this option because we wish to send them a custom email that has the abandoned cart’s information in it. Since the email can be customized, we’ll be able to add different abandoned cart merge tags. It will also help us design the email however we want!

Now, you can draft the email. Enter the email subject, content, and other things. You can also use merge tags from the dropdown in the editor. For eg: {{contact.first_name}}
Additionally, you can add merge tags for custom tags that were created by the plugin, too. Some of them include:
{{contact.custom.wcap_abandoned_cart_html}}
{{contact.custom.wcap_checkouturl}}
Here’s how we have created our custom email for reference:


You can Send a Test Email for the same and then click on ‘Save Settings’.
As per your requirements, you can add in the next steps by clicking on the + icon in the workflow. For example, if you wish to send another reminder, you can add a wait time and the email. If not, you can end your workflow here. So, for this, after clicking the + icon, you will add an Action and choose ‘End This Funnel Here’.

Click on ‘Save Settings.’

Your workflow shall look like this:

It’s time to publish it. Enable the Status toggle to do so:

5. How will it work?
↑ Back to topNow that your setup is complete, all the carts abandoned from your site will receive reminder emails that will be sent via FluentCRM.
Let’s say that a customer abandoned ‘Designer Scarf’ on your site. Before leaving the site, they, however, entered their email address and name which was captured by the Add to Cart Popup from the Abandoned Cart plugin on your site.
To see the information of this captured cart, go to FluentCRM > Contacts. The newly captured contact will be added here:

When you click on it, it will display all the other information captured as well. For example, since the customer entered their First and Last Name, both of these details have been added:


You can also find the contact status in the Automation by clicking on ‘Reports’.

You will get to view Chart Report as well as Individual Report:

According to the report, the email was sent to the customer. This means that after the wait time, the customer did not complete their order and that’s why further action took place based on the Automation setup.
The reminder email that the customer received looked like this:

In Summary
↑ Back to topUtilizing this integration with FluentCRM, you can easily reach out to potential customers who showed interest in your products but didn’t finalize their orders. This can help you recover lost sales and increase your online store’s revenue by bringing back interested shoppers.
Integration with Salesforce CRM
↑ Back to topThe Abandoned Cart Pro for WooCommerce plugin allows you to integrate with Salesforce CRM. The Salesforce CRM is a leading customer relationship management solution that allows businesses to manage customer interactions, track sales performance, and analyze data for smarter decisions. Integrating our Abandoned Cart Pro for WooCommerce plugin with Salesforce CRM empowers businesses to recover these lost sales and enhance customer relationships like never before.
The Salesforce CRM connector will allow you to export the abandoned cart details, such as the customer’s first name, last name, email address, and abandoned product details, with the selected quantity, to the Salesforce CRM. Once you connect with this connector, the plugin will automatically pass abandoned cart data from your WooCommerce store over to Salesforce CRM.
Pre-requisites:
To make this integration work, you can use your existing Salesforce account or create a new one. Also, you need the following to make this integration successful:
- WooCommerce plugin
- Abandoned Cart Pro for WooCommerce plugin
- A valid Salesforce account
1. First, you need to connect the Abandoned Cart Pro plugin with Salesforce:
i. To create a connected Salesforce app, follow these steps:
Log in to Salesforce with your Developer account. In the drop-down list of the account (in the upper-right corner), select Setup
In the left-hand pane, search for “App Manager” and open it. Click on “New connected App”.

ii. On the New Connected App page, fill in the “Connected App Name“, “API name“, and “Contact Email“.
iii. Go to API (Enable OAuth Settings) and select Enable OAuth Settings. In the Callback URL field, you can enter the URL of the Connectors page settings in our Abandoned Cart Pro plugin.
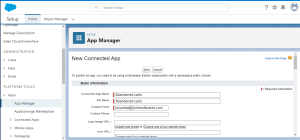
In the Selected OAuth Scopes field, select “Full access (full)” and then click Add. Same way, select other scopes “Manage user data via APIs (API)” & “Perform requests at any time (refresh_token, offline_access)” and click Add.
Click the Save button to save the new Connected App. Note that changes can take up to 10 minutes to take effect.

iv. Go to the API (Enable OAuth Settings) section, then click the Manage Consumer Details button. To ensure your account’s security, Salesforce needs to verify your identity. Enter the code sent to your email by Salesforce to continue. Please note down the Consumer Key and Consumer Secret from here.

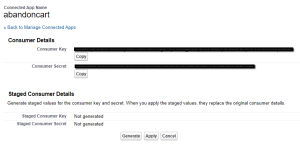
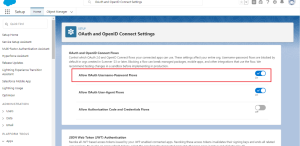
2. Then, go to WooCommerce > Abandoned Carts > Settings > Connectors in our plugin.
3. Click the Connect button for Salesforce CRM.
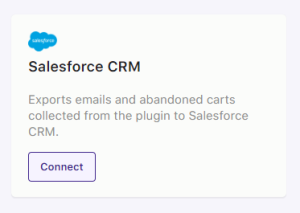
4. On clicking the Connect button, a popup will appear as below. You need to enter the Client ID, Secret Key, and Redirect URI here.
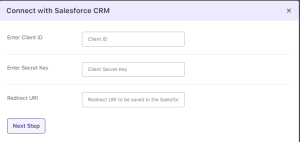
5. For the Client ID and Secret key, you need to enter the Consumer key and Consumer Secret which you have copied earlier. For the Redirect URL, you need to enter the URL of the Connectors page settings in our Abandoned Cart Pro plugin. Once you have filled in these details, click on the Next Step.
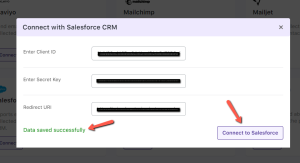
If the filled data is correct then you will get a message saying “Data saved successfully”. You can click on the “Connect to Salesforce” button.
6. Once connected, you will get the options to Disconnect, go back to Settings, and Sync the details of the new abandoned carts to Salesforce. Clicking on the Sync button will sync the newer abandoned carts with this CRM.
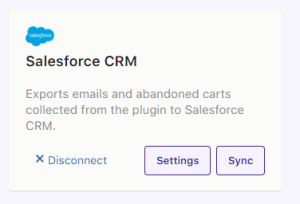
Salesforce captures email addresses as Leads. When a guest cart is captured from the Checkout page, ATC, custom forms, etc. the email address will be sent to Salesforce. Abandoned Cart details will be exported and displayed in the Leads as shown below:

Once the above steps are followed correctly, your integration with Salesforce CRM is complete!
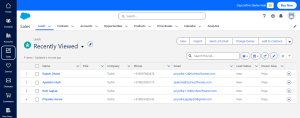
Integration with Google Sheets
↑ Back to topIn v9.4.0 of Abandoned Cart Pro for WooCommerce plugin, you can now connect our plugin to Google Sheets.
Using the integration, you will be able to export your abandoned cart & customer details to Google Sheets. You can then use these to directly connect with them & increase your conversion rates.
A. The Basics
B. Google Console Settings
C. Configuring the Credentials
D. Example
A. The Basics
↑ Back to topTo make this integration happen, you will need the following:
- WooCommerce plugin
- v9.4.0 of Abandoned Cart Pro for WooCommerce plugin
- a valid account with Google Sheets. You can log in to your account here.
B. Google Console settings
↑ Back to topGo to Google Cloud Console. Sign in to your account.

If you are already logged in, you find some of your previous projects right next to the Google Cloud logo. If not you create a project.

Click on the New Project button.

Give a name to your project, something that will make it easier for you to identify that it’s for Google Sheets. In this case, it is ACP Google Sheets Integration. Fill in the details for Organization and Location.
Click the Create button.

Once created, you will be notified about it in your notifications. Select the Project.

The project will look like this:

Go to the Dashboard > APIs & Services > Enabled APIs & services:

Click the Enable APIs and Services setting.

Find Google Sheets in the API Library.

Select it.

Press the Enable button.

Now go to the OAuth consent screen in the dashboard.

Select the User Type as Internal and click Create.

Give a name to your application. In this case, it is ACP Google Sheets Integration. Additionally, provide a valid support email id.

Scroll down to find the App domain section. Provide the home page link and the privacy policy link of your WooCommerce store.

You will now need to authorize domains where this integration will be valid. Provide the links for it, add the email address of the developer, and then Save and Continue:

Move on to the Scopes section and click the Add or Remove Scopes button.

Search for ‘Sheets’ and find the ‘See, edit, create, and delete all your Google Sheets spreadsheets.’ Select it.
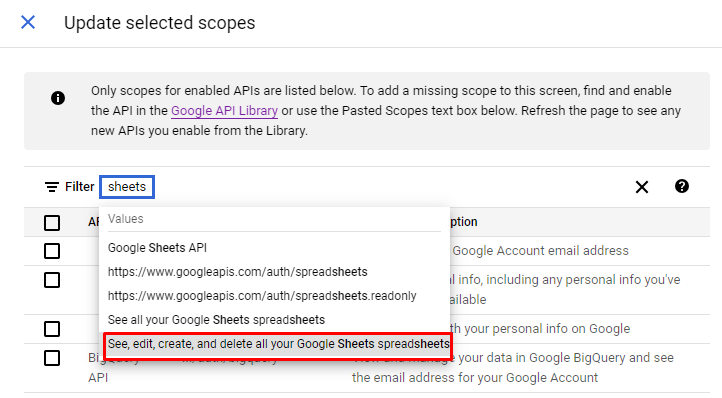
Select the result which is Google Sheets API and press the Update button.

Your scopes have been added so you can now Save and Continue.

You will now reach the Summary section. Check it for any errors.


Once done, press the Back to Dashboard button.
C. Configuring the Credentials
Now it is time to create your Credentials.
Go to your Dashboard > Credentials > Create Credentials > OAuth client ID.

Under Application type, choose Web application.

You will now have to enter the Authorized redirect URLs.

To find this URL, go to your WooCommerce Store, Dashboard >WooCommerce > Abandoned Carts > Settings > Connectors.

Find Google Sheets and press the Connect button.

Find the Redirect URL and copy it.

Go back to your Google Console and paste the link there. Click the Save button.

The OAuth client ID and Client Secret Key will be created. Copy them both and ensure to make a note of them for future reference.

Click the OK button.
Go back to your WooCommerce store.
Go to Dashboard > WooCommerce > Abandoned Carts > Settings > Connectors.
Enter the Client ID and Secret Key you had copied.
Note that you can change the name or the title of the Google Sheet under ‘Sheet Title’. By default, it will be ‘Abandoned Carts Pro- Cart Data.’ The sheet title can be modified even after the integration has been made.

Save the details first. Then, click the Connect to Google button.

If your connection is successful, you will be taken to sign in to your Google account. Select your account.

The scopes that we added earlier will be shown. Select the Allow option.

You will now see the Live Google Sheet button which will take you to your Google Sheet that has all the details of the abandoned carts.

If the integration is successful, you will see these 3 settings on the Google Sheets Connectors page: Disconnect, Settings, and Sync.

The Disconnect button can be pressed if you wish to disconnect the integration.
The Settings button will take you to the Client ID, Secret Key, Redirect URL, Sheet title, and Live Google Sheet settings covered earlier.
The Sync button will sync the details of all the new carts to your Google Sheet.
D. Example
Let’s say that a customer has visited your site and added the product ‘Modern Art’ to their cart.
They have entered their email address in the Add to Cart popup model as shown below:

They decided to abandon the cart.
The details of this abandoned cart can be found in your WooCommerce store by going to WooCommerce > Abandoned Orders.
If the details have been synced, you will find the Google Sheets symbol under the Cart Status section.

If the details haven’t been synced, you will see the Google Sheets icon, however, it will be in an embossed state. This means the sync has not happened yet.

You can even take a print of the cart details that have been synced by clicking the Live Google Sheet Print link found at the top right corner of the Abandoned Orders page.
To view the details that have been synced, go to your Google Sheets account. Search for the ‘Abandoned Carts Pro -Cart Data’ Google sheet.

Open it and you will find the abandoned cart details there.

You will find various details such as Product Name, User ID, User Type, Cart Total, Cart Status, WooCommerce Order ID, Abandoned Date and Time, Shopper’s First and Last Name, Email address of the Shopper, Phone Number, Country, and Checkout Link.

If an abandoned cart has been recovered, then its details will automatically be deleted from here.
That’s it, folks! You have successfully exported your WooComerce store’s abandoned cart details in your Google Sheet.
Reminders Sent
↑ Back to topEmail Sent
↑ Back to topThe Abandoned Cart Pro for WooCommerce plugin helps you keep track of several abandoned cart reminder emails.
You can also figure out the number of emails opened by the customers and the reminder links clicked to complete the transactions.
All of these, which play a backbone to this plugin, come under a single tab named ‘Reminders Sent’ which is primarily the most interesting area that assists you in seeking the attention of lost customers.
Go to WooCommerce > Abandoned Carts > Reminders Sent > Email Sent as shown below:

This section will display the list of reminder emails sent to lost customers in order to convince them to complete their transactions.
On the left-hand side, you get the option to Filter the Reminders sent.
On the right-hand side, you will find the following things:
- Emails Sent
- Emails Opened
- Links Clicked
Lastly, the Emails Sent page will appear below with details such as
- User Email Address,
- Email Sent Time,
- Date / Time Email Opened,
- Link Clicked,
- Sent Email Template.

You can see in the image above that this page gives a quick summary of the results. You can take a look at this page to see how effective the cart reminder emails have been for your business.
Let’s have a look into the details of each part of this page:
1. Filter the Date range
You can select a date range from the dropdown options as shown in the image below, and the results will be displayed as per the selection.

Option selected from dropdown
In the above example, the last 15 days are selected from the dropdown options; hence, the Start Date and End Date are changed to 25th July 2023 and 9th August 2023.
You can also simply enter the Start Date and End Date to select the desired dates and click on the Go button.
All the abandoned cart reminder emails between the selected range of dates will be displayed.
Result Display Area
After the selection of dates is made, the result will be displayed.
It will show all the abandoned cart reminder emails that were sent to the customers between the selected dates, along with the related statistics.

Results displayed after date selection
The results area shows key information about each abandoned cart email:
- User’s email address
- Date and time email was sent
- Date and time email was opened
- If the link in the email was clicked
- Name of the email template used
In the above example, the results show reminder emails sent to [email protected]. You can see when each one was sent and opened.
The “Link Clicked” column shows if the user clicked the link in the email. If they click through to complete their purchase, it will show the page they landed on, like “Cart” or “Checkout”. If they didn’t click, it will be blank.
This helps you see which links are more effective at recovering carts – the cart page or the checkout page. In this case, most customers clicked the Checkout page link.
Finally, the “Sent Email Template” column shows the template used for each email. Here, we see the Initial template sent 15 minutes after abandonment, then the Interim and Final follow-up templates.
This allows you to compare results across templates and determine which content and messaging best motivate customers to complete their purchases.
The results area provides insight into email open and click rates, the recovery process, and which templates perform best. This helps you optimize and improve your abandoned cart strategy over time.
2. Interpretation of Result
↑ Back to topThere is this area on the page where you can check the statistics of all abandoned cart reminder emails sent and can get a complete idea of how many users opened the emails and clicked on the links to get back to the store to complete their transactions.

Results area display
The results area provides helpful stats on your abandoned cart email campaign. At a glance, you can see:
- Total emails sent
- Number of emails opened
- Number of emails where the link was clicked
This gives you a high-level view of email performance.
For example, the above image shows:
- 45 total emails were sent
- 10 of those emails were opened by recipients
- Out of the opened emails, 8 people clicked the link to return to the store
So, at a quick view, you can see about 22% of emails were opened, and 16% of customers clicked through.
This top-level summary makes it easy to monitor how well your abandoned cart emails are working without having to dive into the details. You can quickly spot trends in open and click rates over time.
The main value is getting an at-a-glance sense of email effectiveness. This helps you identify issues like low open rates so you can optimize your email contents and recovery workflow.
Conversion of Orders
The plugin also gives you a provision to check if your abandoned order has been converted to a recovered order or not.
For this, you simply mouse hover over the customer’s email address to whom the cart reminder email was sent.
It will display abandoned orders or recovered orders below the email address as shown below:

Abandoned Order

When you click on the abandoned order link, which is displayed below the email address of the customer, the Abandoned Order page with all its details will be displayed as shown below:

Thus, this shows which items are in the cart, their quantity, and the total amount of this order, along with its Order number, which is #47 for the given example above.

Abandoned Order details displayed
Similarly, when you click on the Recovered Order link, it will take you to the respective order details page, which is displayed below:

The edit order page is displayed
The recovered orders page shows the full details of any completed purchases from your abandoned cart emails.
For a recovered order, you’ll see all the key order information:
- Items purchased
- Quantities
- Total order amount
- Customer billing and shipping details
- Payment method used
This provides the complete picture of orders you recovered with your abandoned cart campaign.
In the example above, you can see the recovered order details displayed together in one place. This makes it easy to monitor and analyze recovered revenue.
Having all recovered cart data on one page streamlines the process. You don’t have to dig through multiple reports. Instead, you can quickly view recovered order details, assess email performance, and identify opportunities.
In summary
↑ Back to topThe recovered orders page consolidates all key data into an easy-to-use single view. This saves you time, effort, and headaches when evaluating your abandoned cart results and strategy.
SMS Sent
↑ Back to topAbandoned Cart Pro for WooCommerce plugin lets you send SMS reminder notifications. In this documentation, you will see the stats and details about them.
Go to WooCommerce > Abandoned Carts > Reminders Sent > SMS Sent. Your typical SMS Sent page will look like this:

SMS Sent page under the Reminders Sent tab
This page displays all the details in such a way that you can understand the effectiveness of sending SMS reminders to customers easily. This is because you can quickly determine whether customers responded to the SMS reminders and completed their purchase or not.
Let us understand each part associated with it in detail:
1. Date Range Filter
You can select the range of dates or select from the Date dropdown as shown below. Accordingly, the results will be displayed.

Date selected for displaying results
The above image shows that the last 7 days have been selected from the dropdown.
The Start Date will change to 9th August 2023, and the End Date will be 16th August 2023.

You can also simply enter the desired Start and End dates and click the Apply Filter button. All the SMS reminders sent between the selected date range will be displayed.
2. Result Display Area
↑ Back to topOnce the date has been selected, the result will display all the abandoned cart reminder SMS that was sent to the customers along with the related statistics as shown below:

Result displayed for the selected date range
Looking at the first entry, here’s the explanation for the results:
User’s Phone Number: This shows the number where the SMS was sent.
SMS Sent Time: The plugin sent the message on 16 August 2023 at 12:19:37.
Date / Time Link Opened: The potential customer opened the link in the message on 16th August 2023 at 13:29:30.
Link Clicked: If the customer clicks the link to revisit the store and complete the transaction, the name of the page from where they visited the store will be displayed under this column.
Meanwhile, if the customer does not click on the link and leaves the SMS without progressing further, the space will remain empty for that entry. In the above screenshot, the Link Clicked column appears blank for most entries except the first one, where a customer had clicked the Checkout page link provided in the SMS.
Sent SMS Template: This shows the name of the SMS Template that was used to send the SMS reminder to the customer.
3. Interpretation of Result
↑ Back to topThis area will help you figure out how many SMS were sent, how many were opened, links clicked and which SMS template worked better for conversion.

Interpretation of the result displayed
In the above image, you can see that the results area shows 4 SMS were sent in the last 7 days, and out of these, 1 customer clicked on the link to complete their purchase.
Results are usually displayed on the top of the page to ease in checking the stats of the number of SMS sent and links clicked.
Also, the Sent SMS Template column can be helpful to check which template and its contents are persuading the customers to click on the link to complete their sale.
Moreover, the name of the link displayed under the Link Clicked column can help you to figure out whether the cart page or the checkout page link has been clicked more and accordingly make changes in the SMS templates to increase the conversion rate.
4. Conversion of Orders
↑ Back to topThis page will also let you know whether the abandoned order has been recovered or not.
You simply need to mouse hover on the phone number and you will know if that order is abandoned or has been recovered as shown below:

Abandoned order

Recovered order
When you click on the Abandoned Order link, the details of the order, like customer data, order, and product details, are displayed as shown below:


Details page when you click on the Abandoned Order link
Similarly, when you click on the Recovered Order link, it will take you to the respective Order details page, as shown below:

Edit the Orders page of the Recovered Order
In Summary
↑ Back to topThe SMS reminder feature opens up new opportunities for recovering abandoned carts. Sending reminders via text message makes it more convenient for customers to complete their purchases.
Text messages are highly accessible – most people always have their phones with them. This makes it easy for customers to click the link in the SMS and finish their transaction.
Text messaging lets you reach customers who may not check their email frequently. The convenience of SMS could motivate more people to return to their cart and convert to a sale.
Overall, the SMS reminder capability provides a new, simple way for people to complete their purchases after abandoning their cart. With text messaging, you can potentially attract more completed transactions from lost sales by meeting customers where they are.
The accessibility and simplicity of SMS are the keys to converting more abandoned carts into happy customers, and this feature expands the options for you to recover revenue in a customer-friendly way.
Product Report
↑ Back to topThe Abandoned Cart Pro for WooCommerce plugin provides a complete report of the products that are abandoned and those that are recovered.
So, let’s find out how you can get to the top abandoned & recovered products for your WooCommerce store.
The below image is a glimpse of the Product Report page.
You can find it by going to WooCommerce > Abandoned Crats > Product Report tab:
Product Report Tab
↑ Back to top
This page above shows details about abandoned and recovered products:
Product Name:
- Lists each product that has been abandoned in the cart
- Examples include Designer Scarf, Art, Cotton Mattress etc.
Number of Times Abandoned:
- Shows how many times each product was abandoned
- Includes total dollar amount abandoned
- Ex: Art was abandoned 14 times, equal to $2,240 total
Number of Times Recovered:
- Shows the number of times a product was recovered
- Ex: Art was recovered 4 times, earning $624 in revenue
Interpreting the Results Area
↑ Back to topLet’s look at the product “Art” as an example:
- Art was abandoned 14 times, totaling $2,240 in lost revenue
- After using the plugin, Art was recovered 4 times, gaining back $624 in revenue
Compared to “Designer Scarf”:
- Art was abandoned 14 times
- Designer Scarf was abandoned 13 times
This shows Art is more frequently abandoned than other products.
So now you know you need to improve Art’s abandoned results by:
- Adjusting pricing
- Improving product images
- Checking inventory stock levels
Additionally, there is a provision to shuffle the products in ascending (up symbol ^) or descending order (down symbol ⌄) by simply clicking on the arrow next to the different column titles.
A. Product Name
↑ Back to topAscending order:

Descending order:

B. Number of Times Abandoned
↑ Back to topAscending order:

Descending order:

C. Number of Times Recovered
↑ Back to topAscending order:

Descending order:

The ability to sort products like this allows you to customize the view for your needs. There are two main ways you may want to sort:
- Sort by most times abandoned: This lists products with the highest # of abandonments at the top. It lets you easily see which products have major issues, leading shoppers to bail out of checking out. You can then focus efforts on improving those product listings.
- Sort by most times recovered: Alternatively, you could sort with the most recovered products at the top. This highlights successes – products that your abandoned cart emails had good results in bringing shoppers back to purchase.
The choice depends on what you want to focus on:
- Biggest problem areas OR
- Quick wins
Either way, being able to shuffle the product list puts what matters most to you right up front. This makes it fast and simple to identify points needing attention or working well worth doubling down on.
Customizing the sort order allows you to configure the data for your business goals, projects in progress, or whatever your top priority is.
Edit Product page
↑ Back to topYou can click any product name to edit that product’s details.
For example, hover over “Art” and click the name to access the Edit Product page.
On this page, you can update:
- Product name
- Description
- Price
- Images
- Other product data
Changing different parameters here could help reduce abandonments for products like Art with high rates.
In Summary
↑ Back to topThe Abandoned Cart Pro product report is like a project report for your business revenue goals. It shows the results of changes made to recover more sales.
It highlights the pros and cons of different plugin settings. This makes it easy to:
- See which settings perform best
- Identify where changes may help
- Make tweaks to keep improving over time
Having clear, actionable data leads to better decisions. You can use the insights to meet the goals of increased revenue from recovered carts.
The reporting allows you to monitor and optimize just like tracking any other business or project. It’s key for understanding the impact of changes to recovery workflow.
Abandoned and Recovered Carts Summary widget in WordPress Dashboard
↑ Back to topThe WordPress Dashboard widget provides a convenient way to track your business’s performance using the Abandoned Cart for WooCommerce plugin.Easily access a summary of Abandoned and Recovered orders directly from your WordPress dashboard:
Navigate to WordPress Dashboard > Abandoned and Recovered Carts Summary widget

Check the tabs on the left corner of this page, which will showcase the ‘Abandoned and Recovered Carts Summary’ widget as shown below:

There are 2 main sections of this widget, namely:
- Abandoned and Recovered Carts Summary of Today, Current, Last Month & Totals
- Top Abandoned & Recovered Product
Abandoned and Recovered Cart Summary of Today
↑ Back to topThis area will show the stats of all abandoned carts which got captured today (present-day) and all the carts that were recovered today using this plugin. It also provides a ratio called the Conversion Ratio which is calculated bearing in mind the total carts abandoned versus total carts recovered the same day.

As you can see from the image above, there was 1 cart abandoned today but that cart was not yet recovered today, hence the conversion ratio shows 0%.
Once the customer completes his transaction today, the recovered carts stats will change to 1 and the conversion ratio to 100% because 1 cart that was abandoned today got recovered today itself.
Abandoned and Recovered Cart Summary of Current Month
↑ Back to topThis tab shows all the stats for the entire current month to date. Hence it will display the total abandoned and recovered carts for the month and its conversion ratio for that month.

As you can see from the image above, there were 2 carts abandoned this month, out of which 1 cart was recovered, which makes the conversion ratio 50%, as shown.
Abandoned and Recovered Cart Summary of Last Month
↑ Back to topThis area will display stats from last month that include the number of carts abandoned and those that were recovered.
The idea behind keeping stats of the current month and last month separately is to understand the progress of the business by each month’s comparison.

The above image shows there were 5 carts abandoned in the last month and only 1 was recovered, hence the conversion rate was too low which is 20%.
Now, from the conversion rate of last month and current month, you can identify the hike in the performance of business using this plugin, as the number of abandoned carts reduced to 1 from 5 carts in the last month.
Also, the recovery of the cart also took place in the current month, making the conversion ratio 100%, which is a huge progress from the business perspective.
Totals
↑ Back to topThis is a crucial area that showcases the overall performance of the plugin. It counts all the abandoned and recovered carts from the time this plugin was installed till date.
It can keep a record of as many months and years of data as required which can help you to understand the overall statistics.

The above image shows that so far, there are a total of 28 carts that been abandoned, and out of those, only 4 carts were recovered; therefore, the Total Conversion Ratio sits at 14.29% only.
Top Abandoned Product & Recovered Product
↑ Back to topThe Abandoned Cart Pro dashboard displays your:
- Top Abandoned Product
- Top Recovered Product

To see product details:
- Click the product name to go to its page
- Make any changes if needed
Like the above example, if you click on Bags, you will be redirected to Bag’s product page.
You can also click “View All” to see full lists of abandoned and recovered products.
Details of each product will be displayed on the View All product page as shown below:

Apart from these records which are displayed, dashboard allows you to customize widget positions and visibility.
For instance, in the first image of this post, where you get a glance at the entire Dashboard page, the title of each widget is shown. You can click on this title and move the widget from top to bottom or sideways anywhere as required.
When you click on the down arrow key on the widget’s title, it will open up to display its details, and when you click on the up arrow key, it will close the widget to hide the contents. This can be visible in the images below:

The widget contents are hidden

The widget contents are displayed
There is Screen Options in the top right. You can Check/uncheck boxes to show/hide specific widgets.

The above image will be displayed when you click the Screen Options tab. If you deselect any of the checkboxes, that widget block will be removed from the page display.
Thus, the Abandoned & Recovered Carts Summary widget not only displays the records and data of abandoned shopping carts but also provides you an overview of the most essential stats, the recovery summary.
In Summary
↑ Back to topThe Abandoned & Recovered Carts Summary widget provides an overview of your key stats. This allows you to:
- See your top abandoned and recovered products.
- View total carts abandoned and recovered.
- Customize widgets to focus on important data.
With these insights in one dashboard view, you can:
- Identify issues causing abandonment.
- Spot recovered cart trends.
- Make informed decisions to boost revenue.
Lastly, the widget gives you an at-a-glance business overview. So use these insights wisely to reduce cart abandonment and recover more sales. Also, make sure to keep the dashboard customized to your needs for effective cart tracking.
Exporting Abandoned Cart data using Webhooks
Recently, we have had some customers come to us with queries on how they can export the abandoned cart data to a 3rd party or system.
While the plugin does provide multiple methods to send reminders to customers (including emails, SMS & FB notifications), the feature to export abandoned cart data to an outsider does hold some merit.
So, in version 8.7.0, we added webhooks.
What webhooks do:
- Send your abandoned cart data to a delivery URL.
- The URL captures the data for further use.
The list of webhooks available in the plugin:
- Email address captured via Add to Cart popup
- Email address captured at Checkout
- Email address captured via Form integrations
- Cart abandoned after cut-off
- Cart Abandonment Reminder Email Sent
- Cart Abandonment Reminder SMS Sent
- Cart Abandonment Reminder FB Message Sent
- Recovery link clicked in reminders sent
- Abandoned Order Recovered
Where can I find them?
↑ Back to topAbandoned Cart plugin webhooks can be found in WooCommerce > Settings > Advanced > Webhooks.
How to set it up?
↑ Back to topClick on the Add Webhook button.

Enter the details.

Click on Save Webhook button.

The webhook should be set to active to ensure data is sent.

Data sent
1. Email address captured via Add to Cart popup
↑ Back to topThis “Cart Abandoned” webhook fires when:
- A guest user adds a product to their cart
- They enter their email address in the popup modal
- Their cart is recorded and tracking starts
This happens before the cutoff time is reached.
“root”: “webhook_id”: 1 “webhook_action”: “atc” “webhook_resource”: “wcap_cart” “webhook_resource_id”: 382 “id”: “382” “product_id”: 271 “variation_id”: 288 “product_name”: “Hoodie” “timestamp”: “1617815128” “email_id”: “[email protected]” “source”: “atc”2. Email address captured at Checkout
If the Add to Cart popup modal is turned off:
The “Cart Abandoned” webhook fires when:
- A guest user goes to the Checkout page
- They enter their email address in the field
- Their cart is recorded, and tracking starts as soon as the email address is captured
This happens before the cutoff time.
“root”: “webhook_id”: 2 “webhook_action”: “checkout” “webhook_resource”: “wcap_cart” “webhook_resource_id”: 383 “id”: “383” “product_details”: 0: “product_id”: 272 “variation_id”: 0 “product_name”: “Hoodie with Logo” “line_subtotal”: 45 1: “product_id”: 291 “variation_id”: 0 “product_name”: “Beanie with Logo” “line_subtotal”: 18 “timestamp”: “1617816368” “billing_first_name”: “Pinal” “billing_last_name”: “S” “billing_country”: “IN” “billing_zipcode”: “400101” “email_id”: “[email protected]” “phone”: “+910000000000” “source”: “checkout”3. Email address captured via Form integrations
↑ Back to topThe plugin lets you capture emails through custom forms.
In this case, the “Cart Abandoned” webhook fires when:
- The user enters their email in a custom form
- They create a cart on your site
- Their cart is recorded and tracking starts
This happens before the cutoff time is reached.
“root”: “webhook_id”: 1 “webhook_action”: “form” “webhook_resource”: “wcap_cart” “webhook_resource_id”: “549” “id”: “549” “product_id”: 274 “variation_id”: 0 “product_name”: “Beanie” “timestamp”: “1626192012” “email_id”: “[email protected]” “source”: “form”4. Cart abandoned after cut-off
↑ Back to topThe cut-off time is reached, and the cart is listed on the Abandoned Orders page.
“root”: “webhook_id”: 8 “webhook_action”: “cutoff” “webhook_resource”: “wcap_cart” “webhook_resource_id”: 382 “id”: 382 “user_id”: “63000310” “product_details”: 0: “product_id”: 271 “variation_id”: 288 “product_name”: “Hoodie – Green, No” “line_subtotal”: 45 “total”: 45 “total_tax”: 0 “timestamp”: “1617815128” “billing_first_name”: “Pinal” “billing_last_name”: “S” “billing_country”: “IN” “billing_zipcode”: “” “email_id”: “[email protected]” “phone”: “” “user_type”: “GUEST” “coupon_code”: “” “checkout_link”: “https://staging.tychesoftwares.com/woo_pinal/?wacp_action=checkout_link&validate=uQOUyQCZbWB2KSepiE8w_FLCTcuB64bHE7C309pKpbpgOjwakmiR7gCxeIF-9zcmucIvxJLP7fE0tvpE-Ecoq31EZTvRpw”5. Cart Abandonment Reminder Email Sent
↑ Back to topFired when a reminder email is sent for an abandoned cart.
“root”: “webhook_id”: 3 “webhook_action”: “sent” “webhook_resource”: “wcap_email” “webhook_resource_id”: “382” “id”: “382” “product_details”: 0: “product_id”: 271 “variation_id”: 288 “product_name”: “Hoodie – Green, No” “line_subtotal”: 45 “timestamp”: “1617815128” “billing_first_name”: “Pinal” “billing_last_name”: “S” “email_id”: “[email protected]” “phone”: “” “user_type”: “GUEST” “links_included”: “cart_link”: “https://staging.tychesoftwares.com/woo_pinal/?wacp_action=track_links&validate=CQMOU4-abWDO4UAL7vt8x0KAX52FI_IerDh-n4bgl5caoN47-b3z-o7P4xz4ht124eNvp1A3hLbylEHWmhx5LQRs&c=CgPFl4-abWBcxkPFWLYzRiSuW2E” “checkout_link”: “https://staging.tychesoftwares.com/woo_pinal/?wacp_action=track_links&validate=CANYfo-abWAqZPc-LQmrsHIh3QIFFsIN5PM_0BQHJ05kSwWpPEBn473dPmzccsID7S-J6zBdwcOAhc_IAu5X17PrPszuuA&c=CgPFl4-abWBcxkPFWLYzRiSuW2E” “open_link”: “https://staging.tychesoftwares.com/woo_pinal/?wcap_track_email_opens=wcap_email_open&email_id=332” “sent_id”: 332 “reminder_type”: “email”6. Cart Abandonment Reminder SMS Sent
This webhook is fired when a reminder SMS is sent for an abandoned cart.
“root”: “webhook_id”: 4 “webhook_action”: “sent” “webhook_resource”: “wcap_sms” “webhook_resource_id”: “383” “id”: “383” “product_details”: 0: “product_id”: 272 “variation_id”: 0 “product_name”: “Hoodie with Logo” “line_subtotal”: 45 1: “product_id”: 291 “variation_id”: 0 “product_name”: “Beanie with Logo” “line_subtotal”: 18 “timestamp”: “1617816368” “billing_first_name”: “Pinal” “billing_last_name”: “S” “email_id”: “[email protected]” “phone”: “+910000000000” “user_type”: “GUEST” “links_included”: “shop_link”: “https://staging.tychesoftwares.com/woo_pinal/b” “checkout_link”: “https://staging.tychesoftwares.com/woo_pinal/4ztQ” “sent_id”: “1005252” “reminder_type”: “sms”7. Cart Abandonment Reminder FB message Sent
↑ Back to topThis webhook is fired when a reminder Facebook message is sent for an abandoned cart
“root”: “webhook_id”: 5 “webhook_action”: “sent” “webhook_resource”: “wcap_fb” “webhook_resource_id”: “341” “id”: “341” “product_details”: 0: “product_id”: 282 “variation_id”: 0 “product_name”: “Album” “line_subtotal”: 15 “timestamp”: “1612453586” “billing_first_name”: “Pinal” “billing_last_name”: “S” “email_id”: “[email protected]” “phone”: “” “user_type”: “GUEST” “links_included”: “checkout_link”: “https://staging.tychesoftwares.com/woo_pinal/4ztR” “sent_id”: “1005253” “reminder_type”: “fb”8. Recovery link clicked in reminders sent
↑ Back to topThis is fired when links in reminders are accessed
“root”: “webhook_id”: 6 “webhook_action”: “clicked” “webhook_resource”: “wcap_link” “webhook_resource_id”: “384” “id”: “384” “product_details”: 0: “product_id”: 274 “variation_id”: 0 “product_name”: “Beanie” “line_subtotal”: 18 1: “product_id”: 272 “variation_id”: 0 “product_name”: “Hoodie with Logo” “line_subtotal”: 45 “timestamp”: “1617903036” “billing_first_name”: “Pinal” “billing_last_name”: “S” “email_id”: “[email protected]” “phone”: “” “user_type”: “GUEST” “reminder_type”: “email” “link_clicked”: “qQFD6v3wbmCz_qoS_WG_WYrr6oL2G2F3dOIP4_hW5QGKd3PP0nB8ocoMcR0SZeI8YPPa6IdZxF5oAUoxwbKdCJPwAPEiSQ” “time_clicked”: 16179033139. Abandoned Order Recovered
This is fired when a cart is recovered using a link sent in any of the reminders.
“root”: “webhook_id”: 7 “webhook_action”: “recovered” “webhook_resource”: “wcap_cart” “webhook_resource_id”: “384” “id”: “384” “product_details”: 0: “product_id”: 274 “variation_id”: 0 “product_name”: “Beanie” “line_subtotal”: 18 1: “product_id”: 272 “variation_id”: 0 “product_name”: “Hoodie with Logo” “line_subtotal”: 45 “timestamp”: “1617903036” “billing_first_name”: “Pinal” “billing_last_name”: “S” “email_id”: “[email protected]” “phone”: “000-0000” “user_type”: “GUEST” “order_id”: 537 “total”: “63.00” “tax_total”: “0”We hope the above helps you get started on creating and using the webhooks.