To accept bookings, you’ll need to create a bookable product, which differ from normal WooCommerce products and have added features that allow customers to book and schedule appointments, rentals, or reservations for specific dates and durations.
When creating a bookable product you have two options:
- Use a Bookable Product Template to get a quick start.
- Create a Bookable Product from scratch, and configure all the settings yourself.
The available settings for bookable products are explained in detail below:
- General Settings – Configure tax properties, booking duration, calendar display, plus confirmation and cancellation preferences.
- Availability Settings – Store-level, product-level- and resource-level rules can be used together to control what time slots can be booked.
- Costs for Bookable Products – Bookable products have additional cost settings to charge for lengths of time.
- Persons Settings – Person settings allow your customers to book for multiple people of different types. (e.g. children adults)
- Resources Settings – Resources allow you to share availability of assets like staff and equipment across bookable products
Create a Bookable Product from a Template
↑ Back to topYou can get a quick start by creating a bookable product from a template on the Bookings > Add Product page.
Clicking on one of the template cards opens a popup box showing the details of the template bookable product on the left side, and a front-end preview on the right side to help understand the template before selecting it. When you select a template, a preconfigured bookable product is created, along with resources and person types to match your chosen template Learn more about the different included bookable product templates.
Create a Bookable Product from Scratch
↑ Back to topFollow the steps below to create a booking product from scratch:
- From your site’s admin area, go to Products > Add New.
- Enter a title and description for your product.
- Scroll down to the Product Data and select Bookable Product in the dropdown menu.
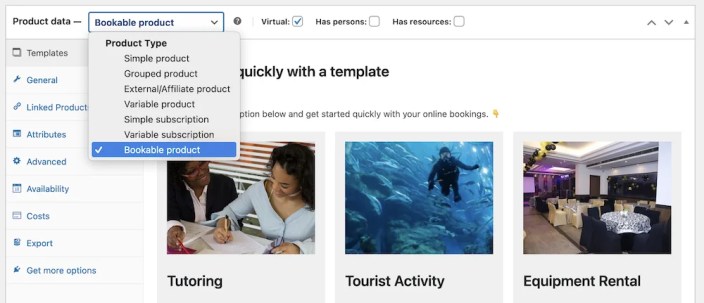
- Tick the Virtual checkbox if your product does not require shipping. This removes the Shipping tab.
- Click through the product data tabs to configure the settings for your bookable product.
Bookable products are extremely flexible and can cover a range of use cases. Review the settings below to decide how you’ll configure your bookable product.
General Settings
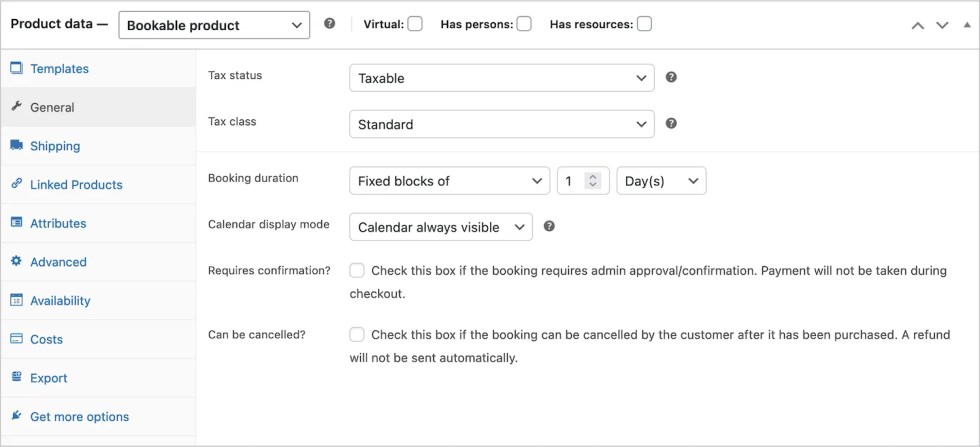
↑ Back to topThe General settings include information about tax (if enabled), booking duration, calendar display, confirmation, and cancellation preferences.
Taxes
↑ Back to topSelect the appropriate Tax status and Tax class for this product, should you need to charge tax or not.
Booking duration
↑ Back to topThe booking duration determines how long a booking lasts. The duration can defined by the store manager (fixed blocks) or by the customer (selected on the front-end). Duration units can be hours, minutes, days, or months.
- Fixed blocks of have a set duration that the store manager defines. The customer can only choose one block which will last the defined amount of time. For example, a hairdresser appointment lasts one hour and a customer can only book one at a time.
- Customer defined blocks of have a set duration, but the customer can choose how many blocks they want. For example, a co-working space offers hourly reservations and a customer can define how many 1-hour blocks they would like to book.
- Selecting Customer defined blocks reveals Minimum duration and Maximum duration fields. These fields determine the shortest and longest durations a customer can book for. For example, using a 30-minute block with the minimum set to 2 and maximum to 10, a customer must book at least 2 blocks (1 hour) and anything inbetween up to 10 blocks (5 hours).
- A dropdown, displayed to the customer when viewing the product, will show blocks in minutes/hours that they can use to specify the duration.
A booking can be set in blocks using minutes, hours, days, weeks, and months. If using hours and minutes, you can specify what time the bookings start under Availability Settings.
Calendar display mode
↑ Back to topSelect Calendar always visible or Display calendar on click. The calendar will always show by default.

Enable Calendar Range Picker
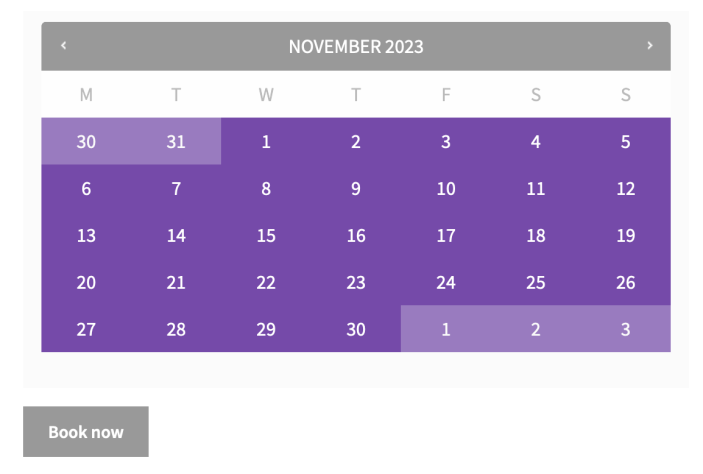
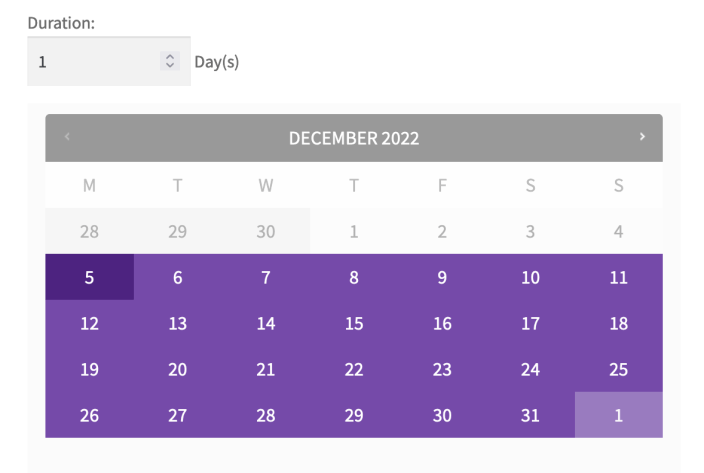
↑ Back to topIf you set the Booking duration to Customer defined with a unit of Days, then another option, Enable the calendar range picker, appears within the General settings tab.
Enabling this allows customers to select a start date and an end date for their booking within the calendar itself.
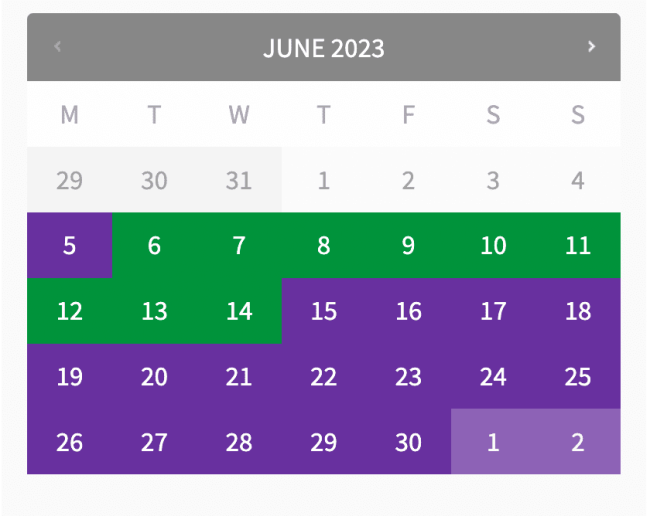
If you do not Enable Calendar Range Picker, a Duration selector indicates the number of days required instead, and the customer only selects the start date on the calendar.
Requiring Confirmation
↑ Back to topYou should tick the Requires confirmation checkbox if a store manager does not need to review bookings. Rather than taking the payment at checkout directly, the customer inputs details, and submits them for approval.
Bookings requiring approval will remove other items from the cart. They must be checked out alone since they use a separate “Check Availability” payment gateway.
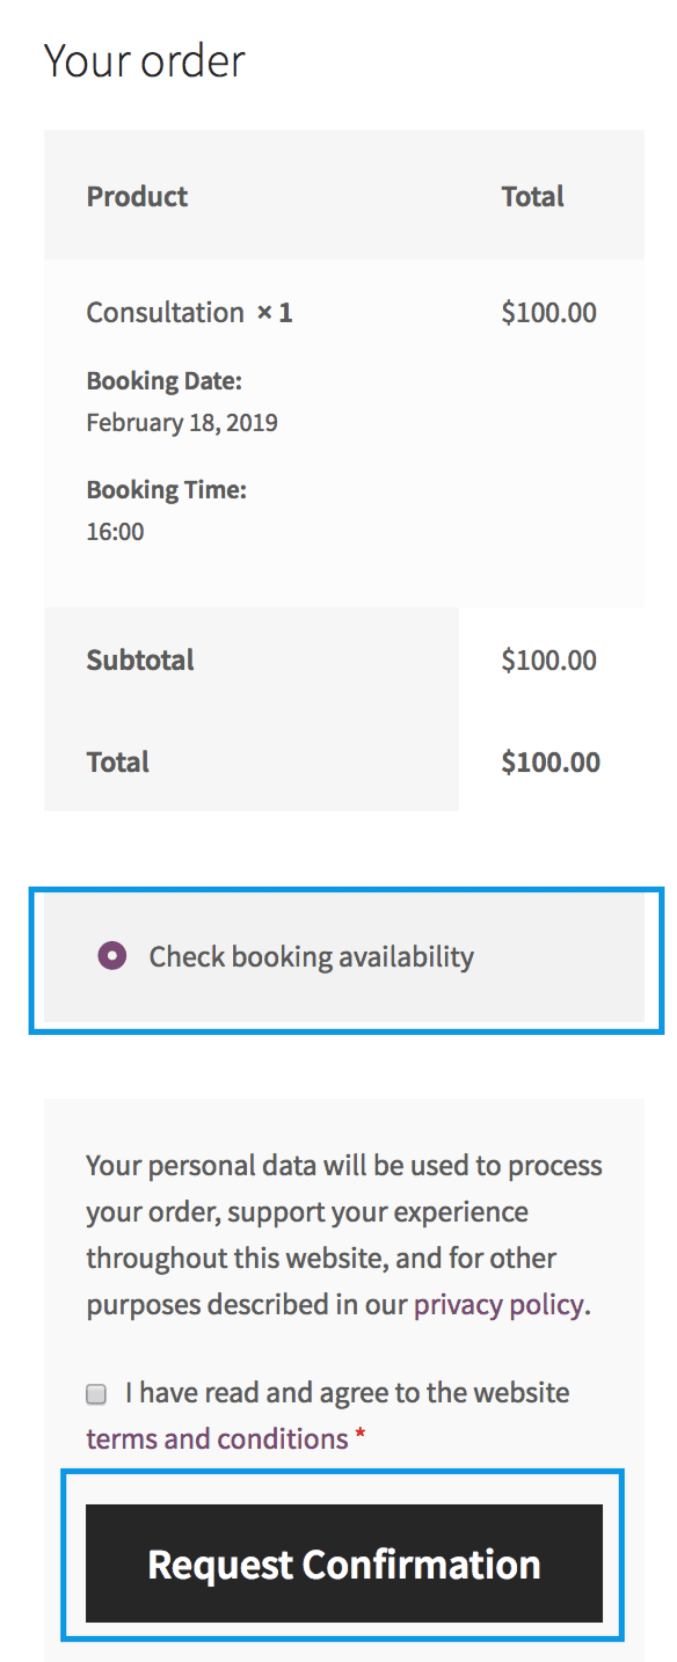
If you tick the Requires Confirmation checkbox then:
- WooCommerce will only present the Check Availability option when checking out.
- WooCommerce will remove other items from the cart should a customer add this type of bookable product.
Please note that you can’t enable/disable the Check Availability “payment gateway” under WooCommerce > Settings > Payments like you can with other gateways. This payment method is displayed/hidden based on whether or not a bookable product requires a store manager’s confirmation.
Once a store manager approves a booking, the customer receives another email that requests payment.
Allowing Booking Cancellation
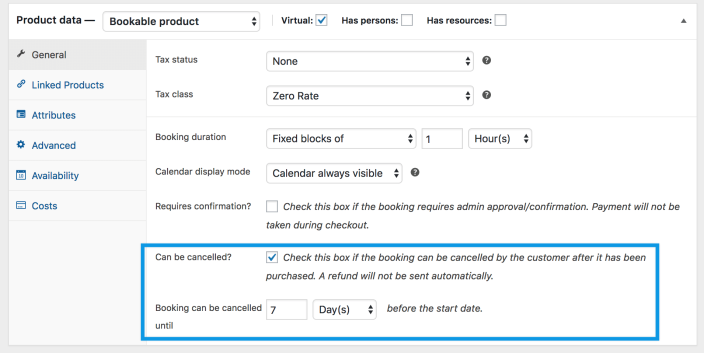
↑ Back to topYou may choose to allow customers the ability to cancel a booking by enabling the Can be cancelled setting.
Availability Settings
↑ Back to topThe Availability tab controls the availability of specific slots. Learn more about booking availability settings at Availability Settings
It is also important to understand how the “Priority” setting allows you to establish a priority order for determining the availability of your bookable products or services. Learn more about priority settings at: Understanding How Priority Affects Availability Rules
Costs for Bookable Products
↑ Back to topThe Costs tab controls the costs for specific slots. Continue reading about Bookable Product Cost Settings.
Persons Settings
↑ Back to topIf a customer can make a booking for multiple persons at once, tick the Has Persons checkbox. Continue reading about the persons feature in Bookings.
Resources Settings
↑ Back to topIf you check the “Has resources” option, it reveals the resources tab. Resources allow you to define and manage finite components required for your bookable products or services. Resources can represent anything necessary for fulfilling a booking, such as rooms, equipment, staff members, or any other tangible or intangible assets. Learn more about adding and managing Booking resources.
Export
↑ Back to topYou can export a bookable product to another site or share it with support to assist with troubleshooting. Learn more about exporting a bookable product.
Deleting Bookable Products
↑ Back to topIf you need to delete a bookable product, that can be done much like with any other product by moving it to the trash, then deleting it from the trash.

If a bookable product has any connected bookings upcoming, the product will not be deletable and you will be shown a notice explaining this. This helps ensure a smooth delivery of the booking for your customer. Deleting any associated bookings for the product, or unassociating the bookings from the bookable product in the Edit Booking view. Will enable you to delete the bookable product.
Questions and Support
↑ Back to topSomething missing from this documentation? Do you still have questions and need assistance?
- Have a question about a specific extension or theme you’d like to purchase? Use our Contact us page to get answers.
- Have you already purchased this product and need some assistance? Get in touch with a Happiness Engineer via the qphmycoi.top Support page and select this product name in the “Product” dropdown.
